
In Part 1 we outlined the Carrington Effect, and here is where we will start. With an EMP, there are a lot of unknown variables that can affect the scope and duration of the EMP wave. Many scientists have found it is possible for an EMP wave to last for 15 to 20 minutes within the atmosphere (the ionosphere, to be exact). This is a major “sticking point” that should concern you: if the wave lasts 15-20 minutes, then when you think it’s over (and it’s not), you may pull your equipment out of your shielding….and have it ruined as such.
I did an article for SHTFplan.com back in April of 2015 and I made this diagram for building your own Faraday cage. A Faraday cage is nothing more than a closed or openwork metal shielding system that allows the Carrington effect of the EMP to pass along its surface and harmlessly into the earth while shielding electronic equipment within.
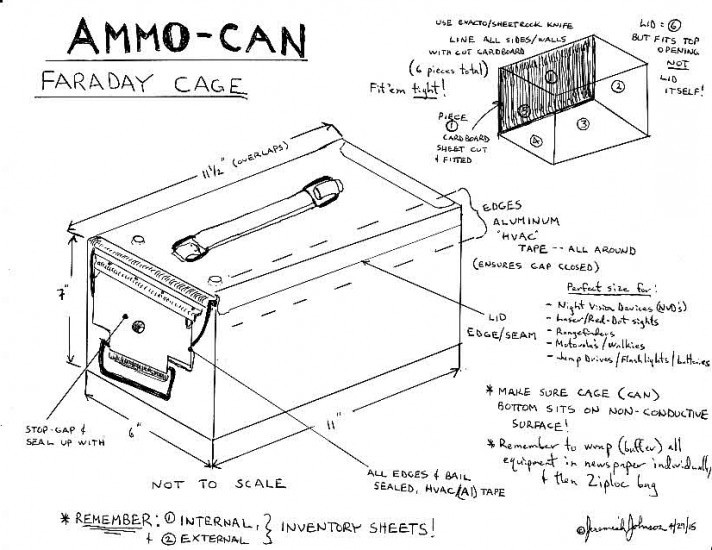
All of your devices need to have the batteries removed from them. Wrap the device in newspaper, then a layer of foil, and then another layer of newspaper, and finally a Ziploc bag on the outside. Nestle all of your equipment snugly in the cage, and when all is in place, insert an inventory sheet…. this is important! You may (in the resultant confusion) lose the original, and this will ensure you have the contents noted. When you’re ready to close up the cage, make sure the lid has some newspaper near the top and covers the contents, along with the cardboard. Close the top, then seal it up with aluminum HVAC tape…run you about $15.00 per roll. Go all around that outside edge where the lid-edge mates with the can. Especially cover the hinge and beneath the handle.
When all is said and done, place your cage on a nonconductive surface, such as wood or brick. Do not set it on carpeting, as the carpet can build up static electricity and hold the effect onto your cage longer than usual. Follow JJ’s rule # 1: Always have two of everything, and one of the two in a cage at all times. This may seem hard, as you may have night vision devices for yourself and your spouse. Guess what? You need four pairs, then: two for the cage and two for immediate use. Don’t shortchange yourself! You know, I saw a construction truck this afternoon while I was on my way back home with a very profound slogan (unattributed) for the guy’s business. The saying went as such:
“The dissatisfaction you will experience with something of poor quality will far outlast the moment of joy you experience by finding that item at a low price.”
This does not mean that you can’t cut corners…but you have to weigh it with the effectiveness (or ineffectiveness) of the results you’re trying to obtain. Other things you can do are to build an entire room with a cage system. Your conductors for the cage are, in order of effectiveness, as follows: Copper, aluminum, steel/ferrous material.
You can make small cages out of tins for specialty equipment. You can also use Mylar bags to help shield from the gamma rays. I use the daylights out of empty snack bags, cut with an Exacto/utility knife and plaited together. Test them out. Place your remote control for your TV or your cellphone into a bag, and try them…after experimenting, you will find they are blocked from functioning.
For vehicles you can make a grounding chain in the same manner as with tractor-trailers and their use of a grounding wire to prevent static discharge and lightning strikes. The wire maintains constant contact with the ground. Electricity and hence an EMP will go to the frame of the vehicle and then along the wire/chain and into the ground. Now it’s a pain in the butt to drag around a chain with 1/8” links, so obtain a braided aluminum or steel wire of the type used with a dog run tether-cord. Ensure periodically that the worn end is reformed to have contact with the ground.
The chain can be attached to the rear axle and then coiled up and left on the ground, preferably bare ground, although concrete and asphalt are not ruled out. Remember, the important thing is to wait a sufficient amount of time before detaching/removing any of your shielding. Maybe even a few days, to be on the safe side.
Bottom line: you’re going to lose a certain percentage of your gear and electronic devices. The only limitation here is the extent that you will allow yourself limited…you can put it all in cages. Guess what? The less you expose, the more you will have to use after the SHTF. There’s a guy named Arthur Bradley that put out a book on defending against EMP’s and solar storms. There are plenty of websites to place your feet upon the path, including this one and SHTFplan.com. You can take these steps now and keep your costs low, as all of these materials are easily found and not very expensive. I look forward to your comments and invite you to share some of your experiences and planning with all of us. Hang in there, and stay frosty! JJ out!
This article was originally published at Ready Nutrition™ on March 1st, 2016


Regarding the suggestion to “place your remote control for your TV or your cellphone into a bag, and try them” to verify electromagnetic isolation, please note that most remotes use infrared light as the communication means, which means that they are optically based, and hence any opaque bag will block them, regardless of whether they block EMPs or not. Don’t use this test unless you are sure that the remote operates using RF, which is not the case for most electronics (i.e., TVs or disc players).
I don’t know if you still monitor this site but today June 10th 2017 the 3 main news headlines are about the very real threat of N Korea hitting us with an EMP. You are right on the target. Last week everyone was teasing me and now they want to come over to my house when it happens. I said,”If your not already in my house just keep on walking.”
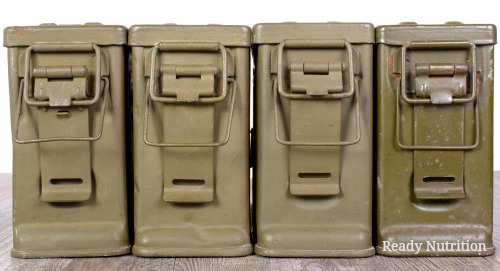
I built 4 Faraday cages exactly to your specs, they look great but I have no way of testing them. 4 AMMO Boxes, cardboard floor – walls – inside top. Items in newspaper – aluminum foil – more paper and inside a zip lock. More foil on the floor , more paper and more foil. Sealed with Aluminum Tape. That’s all I can do. Also at your local grocery store you can get cardboard when they put out yougert. There are cardboard pieces that fit exactly into the ammo box with no cutting, like they were made for this. OK, hope you get this, and thanks.
You can easily test their effectiveness by placing a radio or cellphone in and closing the lid. If the radio stops playing or the cellphone doesn’t ring when you dial it, you’ve done it right.