
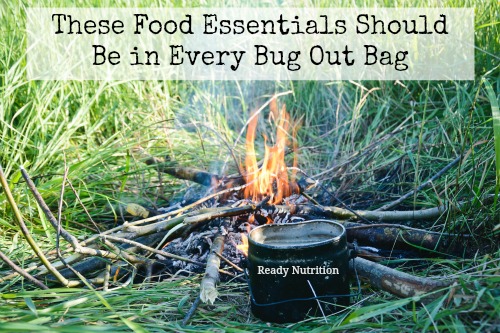
When most people think of emergency rations, they think of MREs. However, Joshua Krause wrote an excellent article on what happens to most people who consume them.
“In the past, a lot of veterans have reported severe constipation for the first few days, sometimes followed by the exact opposite for another few days.”
Being painfully bloated and tied in gastric knots followed up by a severe case of the trots is not how I would like to spend my time when the SHTF. If you’re like me and have food allergies, finding an MRE or any other prepared, ready-to-eat meal becomes a challenge. Any food packed in a BOB needs to be lightweight and calorie-dense. The best option is to learn to make your own specifically tailored to your taste buds and diet restrictions.
Breads
Grains have been called the Staff of Life. They can supply much needed carbohydrates (energy) needed for the sustained hiking one might find themselves doing if the SHTF. They can also help satiate an appetite (fill you up) when other food sources aren’t as plentiful.
Hard Tack
This plain, simple bread can last for a year or more. But it is also as hard as a brick, doesn’t provide many calories per ounce, and I would have to be starving to eat it. However, soaked in a liquid like broth or milk, it becomes quite filling. Ideally, you should strive for 125 calories per ounce (weight measure) for your food. Hard Tack falls short, but has the added benefit of an extremely long shelf life without any kind of refrigeration.
This recipe, from Practical Primitive, is one of my favorites:
Gather your ingredients:
- 1 cup white flour
- 1 cup whole wheat flour
- 1 cup cornmeal
- 2 cups of honey
- Preheat your oven to 350 degrees.
- Grease a muffin⁄cupcake tin in preparation for the batter. This will keep it from sticking. (You could also use paper cupcake liners, so long as you spray them well with a good no-stick cooking spray. Otherwise you’ll never get the papers off!)
- In a large bowl, thoroughly mix together the white flour, whole wheat flour, (any additional flours) and cornmeal. In a mixing bowl, mix ingredients. (Feel free to experiment with substituting different types of flour. We’re substituting a ¼ cup of the white flour with Amaranth flour.)
- Take the 2 cups of honey and heat them carefully in a small sauce pan until the honey has become thin and runny. Do not allow it to come to a boil.
- Pour the honey into the flour mixture and combine until the honey has been completely mixed in with the flour. If the batter is too thick, add some hot water, a little at a time, until the batter is of a thin enough consistency to drop off a spoon.
- Fill each greased cupcake holder about ½ full with batter. (Makes about 18 cakes.)
- Bake at 350 degrees for 15-20 minutes, until cakes are golden brown and a toothpick inserted into the center comes out clean.
- Turn the finished cakes out from the pan and allow to cool. While still warm the cakes will be relatively soft, but as they cool they will lose their spongy texture and within a few days will become hard as rock!
This bread requires NO refrigeration and will last almost indefinitely — but once it hardens be sure to soak it in some milk or coffee or some sort of liquid first, or your teeth might regret it!
Legend has it that this next bread was originally created in 1950 to climb Mount Logan. There are many variations of this recipe on the Interwebs, and that’s the beauty of it: you can modify it to suit your tastes. This recipe, from How to Wilderness, is hands down my favorite. Not as non-perishable as Hard Tack, but certainly much more delicious!
Logan Bread
Dry Ingredients:
- 2 c. wheat flour
- 2 c. white flour
- 2 c. quick oats
- 3/4 c. brown sugar
- 1/2 c. powdered milk
- 2 teaspoons baking powder
- 1 teaspoon salt
- 1 teaspoon nutmeg
- 1 teaspoon cinnamon
Wet Ingredients:
- 1 1/2 c. water
- 3/4 c. honey
- 1/2 c. molasses
- 3/4 c. oil
Goodies:
- 1 1/2 c. water
- 3/4 c. honey
- 1/2 c. molasses
- 3/4 c. oil
Cooking Instructions:
1. Heat oven to 300F.
2. In a large mixing bowl, combine all dry ingredients.
3. Add liquid ingredients and stir thoroughly.
4. Add goodies. Feel free to improvise your own.
5. Pour into a greased 9 x 13-inch pan.
6. Cook at 300 degrees F for one hour.
7. Remove from oven, and cut into desired pieces (2 x 3 inches).
8. Return to oven at lowest setting possible, with door slightly open.
9. Cook for another hour or so to further dry.
10. Remove, cool, then wrap cut squares in plastic.
Healthy Choices: Fruits, Nuts, and Veggies
GORP (“Good Old Raisins and Peanuts” aka Trail Mix to most Americans) has been a favorite of backpackers for many years. There’s some debate over whether it’s more economical to buy pre-made GORP from the store or to make it at home. Personally, I prefer to make my own GORP. I have more control over the ingredients by incorporating homegrown fruits and veggies, can omit ingredients I don’t like or my family members can’t eat due to allergies, and I am assured that each one ounce serving contains at least 125 calories.
To get started, choose a recipe that sounds good to you. There are many on the Internet from savory to sweet. Next, use a calorie calculator like this one to determine the caloric content of each ingredient listed. I divide my batches into smaller snack-sized bags which I then put into a larger Ziploc quart-sized freezer bags. The additional weight of the thin snack bags in nominal while allowing easier rationing to insure proper caloric intake while the added thickness of the freezer bags helps protect the GORP in my backpack. Single-serving sized bags also allows me to trade or share with others on the trail without revealing my entire cache.
Protein and Fat
A properly mixed GORP can provide all the protein and fat needed to sustain your nutritional requirements, but menu fatigue can set in quickly. Menu fatigue has been documented in military, polar expeditions, and even in space settings and can cause a lower food intake and weight loss. Obviously, these two things that should be avoided during the high energy needs of bugging out on foot. To counter it, pack a sweet and a savory GORP recipe.
Another option is jerky. Learning how to make your own jerky is an excellent prepping skill. The National Center for Home Food Preservation recommends using a heat source, like a low oven or a dehydrator to insure food safety, however, humans have been drying meat naturally without electricity for centuries.
Bugging out on foot, under extreme stress, while carrying a load in (potentially) rugged terrain requires A LOT of calories. There is no better dense caloric source than fats. Deficiencies in Essential Fatty Acids (EFA) can cause “…dry skin, hair loss, and impaired wound healing” (Source). This recipe for Super Spackle (trust me, it’s much more delicious than the name implies) will deliver the calories and ESAs needed to keep you fueled and healthy.
Conclusion
Preparing to bug out on foot if the need should arise requires physical fitness and lightweight calorie-dense foods. Be sure to include different taste sensations, and the correct balance of carbohydrates, protein, and fats. Knowing how to prepare a variety of trail-worthy foods can help avoid menu fatigue and insure your survival while on the move.
This article was originally published at Ready Nutrition™ on February 20th, 2016


Interesting article! Thanks for including a link to my Super Spackle (name designed to amuse people). I have also made Logan Bread, and really liked it!