Everyone is talking about growing their own food. Lots of people are starting backyard gardens, filling pots on balconies and patios, and even starting little farms in the suburbs.
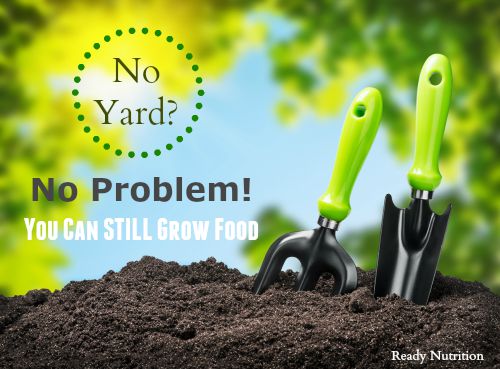
But not everyone has outdoor space. What if you are living in an apartment and have no place to even put a pot for a tomato plant? Does this mean you are completely at the mercy of other people if you want fresh food?
No! There are quite a few things you can do to produce your own food, even without a backyard or patio.
Here are two solutions that will work for nearly anyone, anywhere.
Windowsill garden
If you have a sunny windowsill, you can grow herbs and greens. Plants with shallow root systems can thrive in a small pot.
- Garlic Greens: Plant individual cloves of garlic, pointy side up. Once they grow, you can snip off the greens and use them like chives or green onion tops.
- Microgreens: In a shallow tray filled with about 2 inches of damp potting soil, sprinkle seeds like radish, kale, Swiss chard, beet, basil, and dill. Add a thin layer of soil on top of the seeds. Place them in a sunny window, but a cool place (about 70 degrees Fahrenheit) and mist them with water once or twice per day. Harvest when they are about 2 inches tall by snipping off the leaves with scissors. (Leaving the roots intact will allow for more harvests in the future)
- Green Onions: Plant green onions in a shallow pot. Place them in a sunny windowsill and keep them evenly watered. When the plant is about 4-6 inches tall, they can be harvested in full, including the white bulb at the bottom.
- Lettuce: Lettuce seeds require similar conditions to microgreens, but need to be planted a bit deeper and further apart. Use a planter with good drainage and place holes about 4 inches apart. Sprinkle a few seeds in each hole. In about 3 weeks, thin the plants, leaving the largest seedling. When it’s time to harvest, take the outer leaves only to allow for repeat harvests.
- Herbs: A warm, sun-filled window sill is the perfect habitat for herbs like chives, basil, rosemary, parsley, mint, and thyme. Look for pots with good drainage that are at least 6 inches deep. Keep the herbs moist initially but after they’ve sprouted and begun to get leaves, they prefer slightly dryer soil. Harvest by clipping the leaves on an as-needed basis.
Sprouting
Sprouting can take a dormant seed and turn it into a nutritional powerhouse in a couple of weeks.
In her book, The Pantry Primer, Daisy Luther explains how to sprout seeds:
Probably the very most common sprout container is a Mason jar with a screen over the top. However, this isn’t the simplest method.
There are inexpensive trays that are specially made for sprouting darned near anything successfully. My set up is a stack of trays that measure 5×6. You can stack as many of them as you want to.
The tray’s bottom is made of small holes for drainage. The process couldn’t be simpler.
- Rinse your seeds. Remove any little bits and pieces that aren’t seeds, like stems, twigs, pebbles, etc. (Think about rinsing beans before you soak them and pulling out the yucky bits– this is the same thing!) Use a mesh sieve and rinse the seeds until the water runs clear.
- Soak your seeds. Generally, 1 part seeds to 3 parts water is a good ratio. Each type of seed has different soaking time requirements, so you’ll have to look this up based on what type of seeds you are sprouting. If you are getting this information online, it’s a good idea to write down your times and any special instructions on your seed container. Most seeds soak for 8-12 hours.
- Skim off floaters. If you have any seeds floating on top of the water, give them a gentle push to see if they sink down with their buddies. If they float back up to the top, skim them off and discard them.
- Rinse your seeds. Sprouting isn’t extremely high maintenance because the “crop” is small. However, 2-3 times per day, you have to rinse your seeds. This only takes a few minutes. Use cool water – not cold – just cool. org recommends using high water pressure to oxygenate your seeds. I like the sprayer on my kitchen sink for this purpose. In very hot weather, use the coldest water that comes from your taps.
- Drain your seeds. It’s vitally important to drain your seeds well each time you rinse. Excess water will cause mold or mildew. I usually shake the seeds in their tray to remove as much water as I can.
- Let them sprout. For the next 3 days, continue rinsing and draining your seeds 2-3 times per day. Be sure to put them in a place with good circulation. Seeds need to breathe too. If you can safely put them outside, they’ll get great circulation there. Mine live on the kitchen counter with the ceiling fan on. Don’t close them up in a cupboard if you want an abundant crop of seeds.
- Photosynthesize your seeds. After 3 days of rinsing and draining, now it’s time for the fun part: watching them become green! If you haven’t been exposing them to light, now is the time. Don’t put them in hot, direct sunlight. They only need a bit of indirect light. It doesn’t take much light at all for them to green right up. I’ve read that even fluorescent lighting will do the trick, but I always use sunshine.
- Continue rinsing and draining. You’ll continue the rinsing and draining process described above for 2-3 more days, at which point most of your sprouts will have sweet little green leaves.
- Remove the hulls. On the last day before harvesting your sprouts, you need to remove the seed hulls. The hull is the hard exterior of the seed that split open when the seed began to germinate. To remove them, put your mass of sprouts into a big bowl of cool water and loosen them up with your fingers. The hulls will rise to the top and can be discarded or put on the compost pile. Swoosh your sprouts around in the bowl to get all of the hulls out.
- Do one more rinse and drain cycle. Let your hull-less sprouts go through one more cycle before you harvest them
- Harvest and eat sprouts. Rinse the sprouts one last time and drain them very thoroughly before putting them in the refrigerator. Put them in a closed container and eat them within 3-5 days.
What can be sprouted? Nearly anything, but especially delicious are beans, peas, radishes, broccoli, and grains, like barley, oats, and wheat.
Sprouted seeds are delicious eaten raw. Top salads, sandwiches, and wraps with sprouts for a big bump in nutrition.
Bean sprouts are heavier and denser. They stand up to light steaming and can be added to a stir-fry for the last couple of minutes over the heat. Don’t overcook them or they will be gummy and unappetizing.
Sprouted grains can be steamed lightly, then topped with milk, fruit, and maple syrup for a hot breakfast. They can also be added to baked goods to increase the nutritional content.
Anyone can increase sustainability
Don’t let anyone tell you that you must have acreage in the country to increase your personal sustainability. As long as you’re creative and refuse to be discouraged, you’ll be surprised to learn how much of your own food you can produce anywhere you happen to hang your hat.
Do you grow food indoors? Share your ideas in the comments below to inspire others!
This article was originally published at Ready Nutrition™ on September 5th, 2015