 [1]
[1]Before you get chickens
Before you take the plunge and start buying baby chicks, do some research to find out which chicken breed is right for you [3]. For my family, we wanted a dual purpose bird for meat and eggs and decided on buff orpingtons and wyandottes. These breeds are also very hearty and can thrive in harsher conditions.
You can purchase chicks at your local feed store or online at a hatchery. Keep in mind that local feed stores usually only carry the more popular chicken breeds and do not always have a large variety of chicken breeds; so if you go this route, you may have to settle for what the feed stores carry. That said, if you order your chicks from a hatchery, you can pick and choose the type of chicken breed that you want. The downside to this is that if the chicks are shipped, it can take its toll on day old poultry chicks. As well, if you order your chicks from a hatchery, they will give you an option of sexing them chicks before shipment. There is a small fee to do this, but it could make all the difference in the world if you only want hens. I’ve known a few people who chose to chance it and wound up with mostly roosters! So, my advice to you is to pay the extra fee and have your chicks sexed.
What You’ll Need:
Now that you have researched what it will be like to raise chickens and you’ll need, it’s time to get the equipment and then your chicks. I am sure you have plans in place for a coop, but for the first month, you will need to erect a “chick nursery.” Make sure you have all the items set up and ready to go before you add your chicks to the nursery/brooder.
Heat Lamp
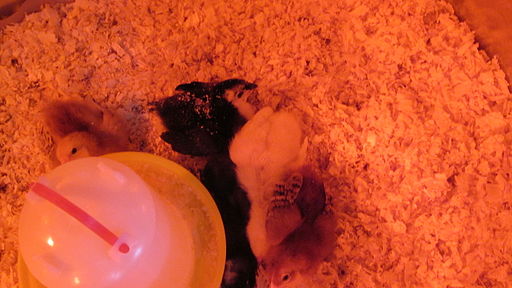
Chicks love heat and should be in an area that is 90 to 95 degrees for the first week. We have a heat lamp [4] attached to our “chick nursery” so they can bunch . A good source of heat is a 250 watt heat bulb [5]. (Red bulbs are preferred, white bulbs have been prone to cause picking.) Hang it 18 inches from the floor. The temperature directly under the bulb will be higher than 90 degrees but the birds will adjust themselves to the area they like. Use 1 bulb for each 50 chicks in cold weather. As well, I drape a towel over the top to prevent temperature fluctuations and keep drafts down.
Here are the temperature estimates you should keep your chick:
Start your chicks in an environment that is constantly 90 to 95 degrees for the first week. Then each week, reduce the temperature by 5 degrees until you reach 70 degrees. Once they are at this point, they shouldn’t need any more heat.
Because the temperature needs to consistently stay around 90-95 degrees F, make sure you have a thermometer [6] in the nursery at all times. I have two thermometers in our nursery. One monitoring the temperature under the lamp and one in the corner. You may need to adjust the temperature accordingly. If they are huddled or climbing on one another, increase the temperature, or if they move away from their heat source, reduce the temperature a few degrees. As well, if you have a brooder lamp stand [7], it will help you adjust your temperatures more quickly, but this is optional.
Structure
Make sure you have a sturdy place to put your chicks for the next 4-6 weeks. The structure should be at least 18 inches high and draft free. I usually use a thick cardboard box for the first week or two and then put them in a long plastic storage container until they outgrow it. Aim to provide 1/2 square foot per bird for the first few weeks. As well, ensure there is a tamper resistant top to your nursery or brooder. Sometimes pets and small children can get over curious.
Ensure that the area chosen is as draft free as possible. Chicks are dependent on having a constant temperature around them and drafts will cause their body temperatures to fall. One way to circumvent this is to create a draft shield out of cardboard to circle around your structure that is about 12 inches high. I had my kids do this as a weekend project with some excess boxes we had laying around, but you can also buy one already made [8], if you are short on time.
Bedding
Provide bedding to catch and absorb chick droppings and change this every few days. Wood shavings, rice hulls, or ground cobs make good litter. What I do is line the floor of the box with sheets of newspaper and then cover it with an inch of two of pine shavings. Once soiled, all you need to do is roll up the paper, pine shavings and all, and throw it into your compost pile. You will also need at least one inch of bedding for the chicks to walk on.
Food and Water
Set out water and chick starter feed in separate containers. I like these feeders [9] and waterers [10] that use a Mason jar to hold the food and water. Keep food and water clean and free of droppings. If chicks are not drinking, dip the chicks’ beaks in the water to get them started.
Chicks may be a little lethargic or “shaken” from transport, so it’s good to have some electrolytes in their water. Here’s a recipe you can use:
Homemade Electrolyte Recipe
- 8 ounces warm water
- 2 teaspoons sugar
- 1/8 teaspoon salt
- 1/8 teaspoon baking soda
I usually dilute this with more water for my chicks, but this recipe is great for all livestock. Use full strength on severely ailing chickens, otherwise mix into their drinking water as needed, a cup per gallon of water. Use this electrolyte drink for the first few days and then switch to regular drinking water.
As well, another trick to revive your chicks is to mix this electrolyte drink in with some of the chick starter to create a mush. Give your birds this special feed and water mix for 3 to 4 days to help pep them.
Caring For Your Chicks
 Once you have your chicks in their nursery, over the next few weeks, continue to pay attention to their progress. Make sure they are alert, eating and drinking. After a week, you will notice the chicks behaviors more and be able to gauge what they need. If they start acting differently, change their bedding and make sure they have plenty of fresh air. During this time, it is good to start sprinkling some grit on your chicks food so the can start getting additional nutrients needed for growth.
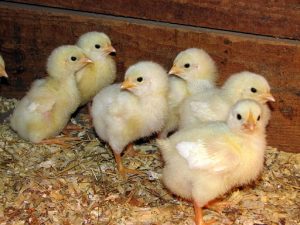
Over the next month, your chicks will start to feather. On warm days put them in a wire pen outside for short periods of time in a draft free area. Keep an eye on them and provide lots of water and a tray of sand so they can dust.
Handling your chicks
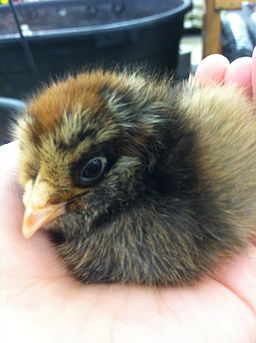 [11]Handling your chicks will get them used to you and will build up trust. As you work with the chicks, remember that slow movements are less apt to frighten them. When you are finished touching your chicks, make sure that you thoroughly wash your hands with soap and water after handling or working around the chicks. Salmonella, a common cause of food-borne illness, can be spread by direct contact with animals that carry the bacteria. Hygiene is very important to keep your birds, you and your family healthy.
Moving Your Chicks to the Coop
After six weeks, start paying attention to see if your chicks are ready to be moved outside. They should have a full set of feathers grown and be able to withstand temperatures up to 70 degrees F. Usually, when the chicks no longer need a heat lamp, it’s time to start getting them ready for their coop. Start transitioning them by moving their brooder or nursery to a colder part of your house. During warm days, chickens that have most of their feathers (sometime between 2 and 4 weeks old) can spend the afternoon outside and return to the brooder at night. At six weeks, you can add them to the coop with their heat lamp on at night to ensure they will be warm enough.
It’s that easy, folks! Chickens really are the easiest livestock breed. It’s no wonder they are the “homesteading gateway animal.” We have had chickens for the last four years and love having them around. I am, by no means, a chicken expert, but this is what we do with our chicks and I have had no problems. Best of luck!