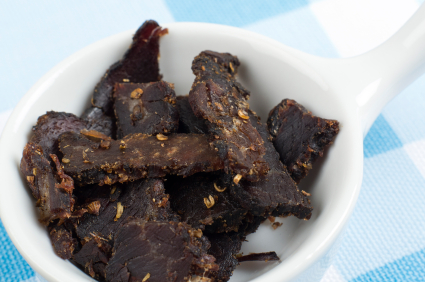
 Protein sources in an emergency situation are essential in maintaining a balanced diet. Because meat sources are perishable, many preparedness minded folks are taking the time to preserve their meats to use during a time when the grid is down.
Dried meats can be pre-cooked or dehydrated raw. Many prefer to cut their meats into small slices or, in the ground variety. The thinner the cuts of meat, the faster it will take to dry.
Tips for Preparing Meat for Dehydration
Partially freeze meat to make slicing easier. The thickness of the meat strips will make a difference in the safety of the methods recommended in this book. Slice meat into ¼-inch strips. For tougher jerky, slice the meat with the grain; for tender jerky, slice across the grain. Trim off any excess fat to prevent the meat from going rancid.
A Word About Poultry
Although the USDA recommends that poultry be cooked until it has heated to an internal temperature of 165°F before it is dehydrated, many people dehydrate raw poultry just like they would dehydrate raw beef. If you feel more comfortable cooking the poultry before dehydrating it, follow this procedure:
Cut poultry into thin slices ¼ inch thick and place on dehydrator trays or, if you are using the oven method to dehydrate, place sliced poultry on a cookie sheet. Maintain a constant dehydrator temperature of 130°F to 140°F during drying
The following recipes can be found in The Prepper’s Cookbook: 300 Recipes to Turn Your Emergency Food into Nutritious, Delicious, Life-Saving Meals and will help you preserve your meat sources into shelf stable goods for a time when you need it the most.
Ground Beef Crumbles
(Makes 4 cups dried meat crumbles)
Taking the extra step of cooking ground meats before dehydrating them helps give them a “crumbled” look.
- 1 pound lean ground meat (beef, turkey, or chicken)
- ¾ cup dry breadcrumbs
- salt and pepper
1. In a bowl, combine the ground meat and breadcrumbs.
2. In a skillet over medium heat, cook the meat mixture thoroughly, breaking it up with a spoon; season with salt and pepper to taste. Drain off the excess grease and allow the meat to cool for a few minutes.
3. Transfer to dehydrating trays and set the dehydrator to 145°F. Dehydrate for 2 or more hours, until the meat is completely dried. Dried meat crumbles can be safely stored in an airtight container in a cool, dark, low-moisture environment for up to 1 month, or in an airtight container at room temperature for up to 1 month or in the refrigerator for up to 6 months to a year.
Ham
Use a lean cut, well cured ham that is trimmed of fat. Cut a fully-cooked smoked ham into ¼-inch cubes or very thin slices. Spread a single layer of the cubes or slices on each dehydrator tray.
Dry at 145°F for about 4 hours, stirring occasionally. Reduce the temperature to 130°F and continue drying and occasionally stirring until the meat is hard and thoroughly dried, about 2 more hours. Store dried ham pieces in an airtight container in the refrigerator for up to 1 month. To re-hydrate, combine 1 cup of dried ham and 1 cup of boiling water in a saucepan. Cover and cook on low heat for about 1 hour.

Another site with plenty of info on dehydrating foods and the recipes too use them is http://www.backpackingchef.com. Glenn does a great job explaining the how as well as the why!!
I noticed you didn’t post my comment that recommended another book to go along with yours. So this is nothing more than an advertisement for your book and not for the informational benefit of your readers. Well I certainly won’t make that mistake again as I won’t visit your site again. I won’t buy your book but I’ll get the so called knock-off instead. BOL
Jim,
I wasn’t censoring your comment, but happened to be on vacation that week and decided to take a break. I’m surprised how fast you jumped to conclusions. 🙂
Tess