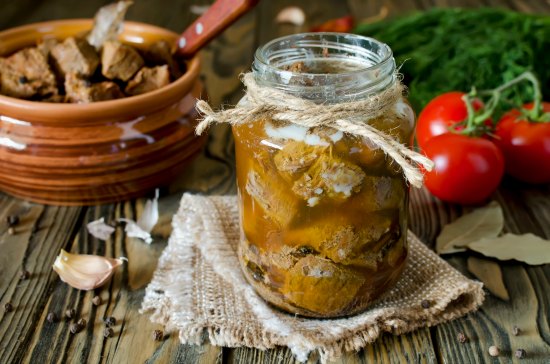
Although my husband doesn’t get much time to spend in the woods hunting, we’re blessed to have friends who are more than happy to exchange some fresh meat for the opportunity to hunt on our property. They do the killing, we help with the processing, and we split the meat. It’s a great deal for all involved. Except for the deer, maybe.
We’ve learned to be grateful for the meat that we are provided through nature, and never want to waste it. Whatever we can’t eat right away is preserved for the months ahead. Although freezing the meat is the fastest and easiest method of preservation, I prefer to can it. Once that meat is in a jar, it will stay good for years with no worry of freezer burn or spoilage. It’s also much more convenient to have on hand as it is already fully cooked and ready to be heated up and eaten in 10 minutes.
I’m still working on acquiring a taste for venison, or perhaps finding a recipe that I like, but I have found canned deer meat to be delicious in so many dishes.

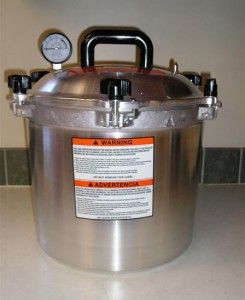
Anytime you are canning meat, you absolutely MUST use a pressure canner. Do not try water bath canning or oven canning meat. You will be risking some serious food poisoning.
When you’re working with fresh, wild meat, you’ll want to do a little prepping of the meat before you can it to remove the gamey flavor. One quick method of doing this is to submerge the pieces of fresh meat in a bowl of fresh, cold water, soaking until all of the blood has washed out. Continue to change out the water as it dirties until it is clear. It is also recommended to chill the meat at least overnight before cooking it. There are many different methods for removing the gamey flavor from venison (I’d love to hear yours, by the way), but proper field dressing is the most crucial factor. Be sure to clean the cavity well, and remove all of the tissues, fat, and bone from the meat before cooling it.
How To Can Venison
Here’s a recipe my whole family loves. My favorite thing about this recipe is that it uses the raw-pack method, which means you don’t have to pre-cook the meat before filling the jars. Just chop the raw venison into cubes, and it’ll be fully cooked and deliciously tender after the canning process.
I like to serve canned venison over rice, mashed potatoes, or noodles; served as taco or quesadilla filling, or tossed into soups and stews. You’d never know it was deer!
Equipment
- Pressure canner (this is different from a pressure cooker)
- wide-mouth funnel
- ladle
- pint or quart jars
- canning lids and rings
- tongs or lid lifter (to safely retrieve the canning lids from the hot water)
- jar lifter (to remove hot jars from canner)
Ingredients per pint jar (double it for quarts)
- 1 pound cubed lean venison
- 1 teaspoon salt
- 1/4 teaspoon ground black pepper
- 1 teaspoon minced garlic
- 4 slices onion
- 1 tablespoon minced green bell pepper (optional)
- 1 beef bouillon cube (optional)
Directions
- Begin with warm, sterilized jars. You can either simmer them in near-boiling water for 10 minutes or run them through your dishwasher. Lids also need to be sterilized in hot, simmering water for 10 min. before using, to activate the sealing compound.
- Place cubed, raw venison into a large bowl. Sprinkle with salt, pepper, and garlic; toss to combine.
- Pack the venison into each canning jar along with the onions, bell peppers, and bouillon if desired. Shake the jars so that the food settles as you pack them; jars should be filled to within 1/2 inch from the rim of the jar. Do not add any liquids.
- Use a plastic or wooden utensil to poke around in the jars to remove any air bubbles.
- Wipe the rims of the jars with a clean, damp cloth to remove any bits of food, then screw on the lids and rings, finger tight.
- Place filled jars into your pressure canner and proceed as per manufacturer’s directions. Process pints for 75 min at 10 lbs pressure (or quarts for 90 min. at 10 lbs pressure).
- Once the canning process is complete, allow the jars to sit in the cooled off canner for 10 minutes before taking the lid off. Carefully remove the hot jars using a jar lifter, then place them on a rack or towel to continue to cool to room temperature. Wait 24 hours before testing the lids to make sure they sealed properly. To do this, unscrew the ring and pull up on the lid. It should not come off. (A good seal requires you to pry the lid off forcefully.) If the lid does come off, place the jar in your fridge to be eaten right away; OR, you can reprocess the meat in a new, sterilized jar.
Store home-canned goods in a cool place, away from direct heat or sunlight for best results. Try to eat your canned foods within the first year when the nutrients and flavor are at their peak, though home-canned goods will stay safe to enjoy for years as long as the seal is intact. If you ever find mold growing in a jar, if a lid is bulging, or if the food has a funny smell, throw it out.
Do you have a venison canning recipe to share? What’s your favorite way to cook deer meat?
About the author, Kendra Lynne: I’m a homeschooling, homesteading mama of four, doing everything I can to help my family live more self-sufficiently on our one country acre here in the Bible Belt South. Although my husband and I grew up as city kids, in 2008 we started feeling the urge to begin pulling ourselves out of the “system” and learning how to provide for our most basic needs. Boy, were we in for a learning curve!! It’s been a journey, but we’ve come a long way. I’ve been sharing about it all on my website, New Life on a Homestead, and am excited to bring the preparedness aspect of this lifestyle to all of you here as well.

