Keep this in mind: If you’ll maintain your car, can you do any less for your weapon…a piece of equipment where cleanliness and function may mean life or death?
Building Your Own Cleaning Kits for Firearms
So, how about a cleaning kit for your weapon? Here’s what you need: One large “mothership” cleaning kit for general purpose and maintenance, and one cleaning kit that is portable, for what you carry or tote into the great outdoors. There are plenty of different brands to choose from, and in the manner that fishing gear is more tailored to catch fishermen than fish, the same principle applies to cleaning kits. You need some basics, and it is the basics we’ll cover. First, your component parts:
- Cleaning rods: brass or steel is preferable; aluminum if there’s nothing else. You want enough sections to be able to clean out your longest rifle barrel, and extra sections and handgrips for pistols and other rifles, as well.
- Bore Brushes: these are often stamped with the caliber (.22, .38, .45, etc.) on the base just past the threaded part you screw into the rod. They are also made for your chamber…to clean where the cartridge is actually seated when fired. The ones stamped with the caliber are meant to pass through the entire length of the barrel. If you have multiple firearms, consider getting this bore brush kit.
- Patch-tips: have an “eye” hole at the end, and are threaded to screw onto your cleaning rod. The larger the eye, the bigger the patch it takes.
- Cleaning brushes: You will have some that are made with nylon bristles, akin to a toothbrush, and some with wire/metal bristles. This latter group is especially helpful with carbon buildups.
- Patches: can be 1” square, 2” square, and so forth; usually made of cotton or muslin fiber to clean the inside of the barrel and other locations with your firearm.
- Pipe cleaners: especially helpful for small holes and other locations that have interworking mechanisms, such as trigger or hammer assemblies. Very useful in cleaning out carbon from around springs, deep within the magazine well, and in front of your firing pins.
- Bore light devices: Once again, there are numerous types to choose from. I carry a small “mini Maglite” that uses one AAA battery; however, I recommend the little Plexiglas 90-degree angle “sticks” that are L-shaped. You place one end into the end of your barrel, and the other end point toward a light source (a light bulb, the sun, etc.) and it will illuminate your barrel.
- Lubricant: Self-explanatory here. The function is to clean and also to coat with a light coating. If you caught my other piece, then you may recall: I recommend 5W/30 Mobil Synthetic Motor Oil, available at about $7 to $8 per quart. All the name-brand oils (Outers, etc.) sell for little 1 – 2 ounce bottles for about $3 to $4. You do the math. The Mobil Synthetic is a better oil, and far less expensive.
- Bore Solvent: On this one I don’t cut corners, because other solvents can leave a film…I pick up the brand-name stuff from Outers, RCBS, etc. A small bottle of it will last you a long time if you stretch it. You need it to clean off hardcore powder fouling…the type coming from when you burn off more than a couple of hundred rounds in a weapon. Search your catalogs, and you can find volume deals for a gallon at a time.
- Cleaning rags, pouches, and other accessories (magnifying glass, scraping tools, etc.)
Now as we mentioned in the beginning, what you can do for ease of simplicity is work from the “mothership” principle: consolidate the majority of your supplies in one box/chest, and “work” off of smaller, independent “kits” for individual firearms.
You want the ability to clean each weapon no matter where it is. If they’re consolidated in one location? Fine, but you want the ability to throw together a pouch with all of the supplies and materials listed above specific to any firearm. Tote the kit with you along with the firearm when you leave home, away from the consolidated supplies (the mothership). You will find that you can build numerous “kits,” or pouches for each firearm. Keep them all together until the time you take the firearm away.
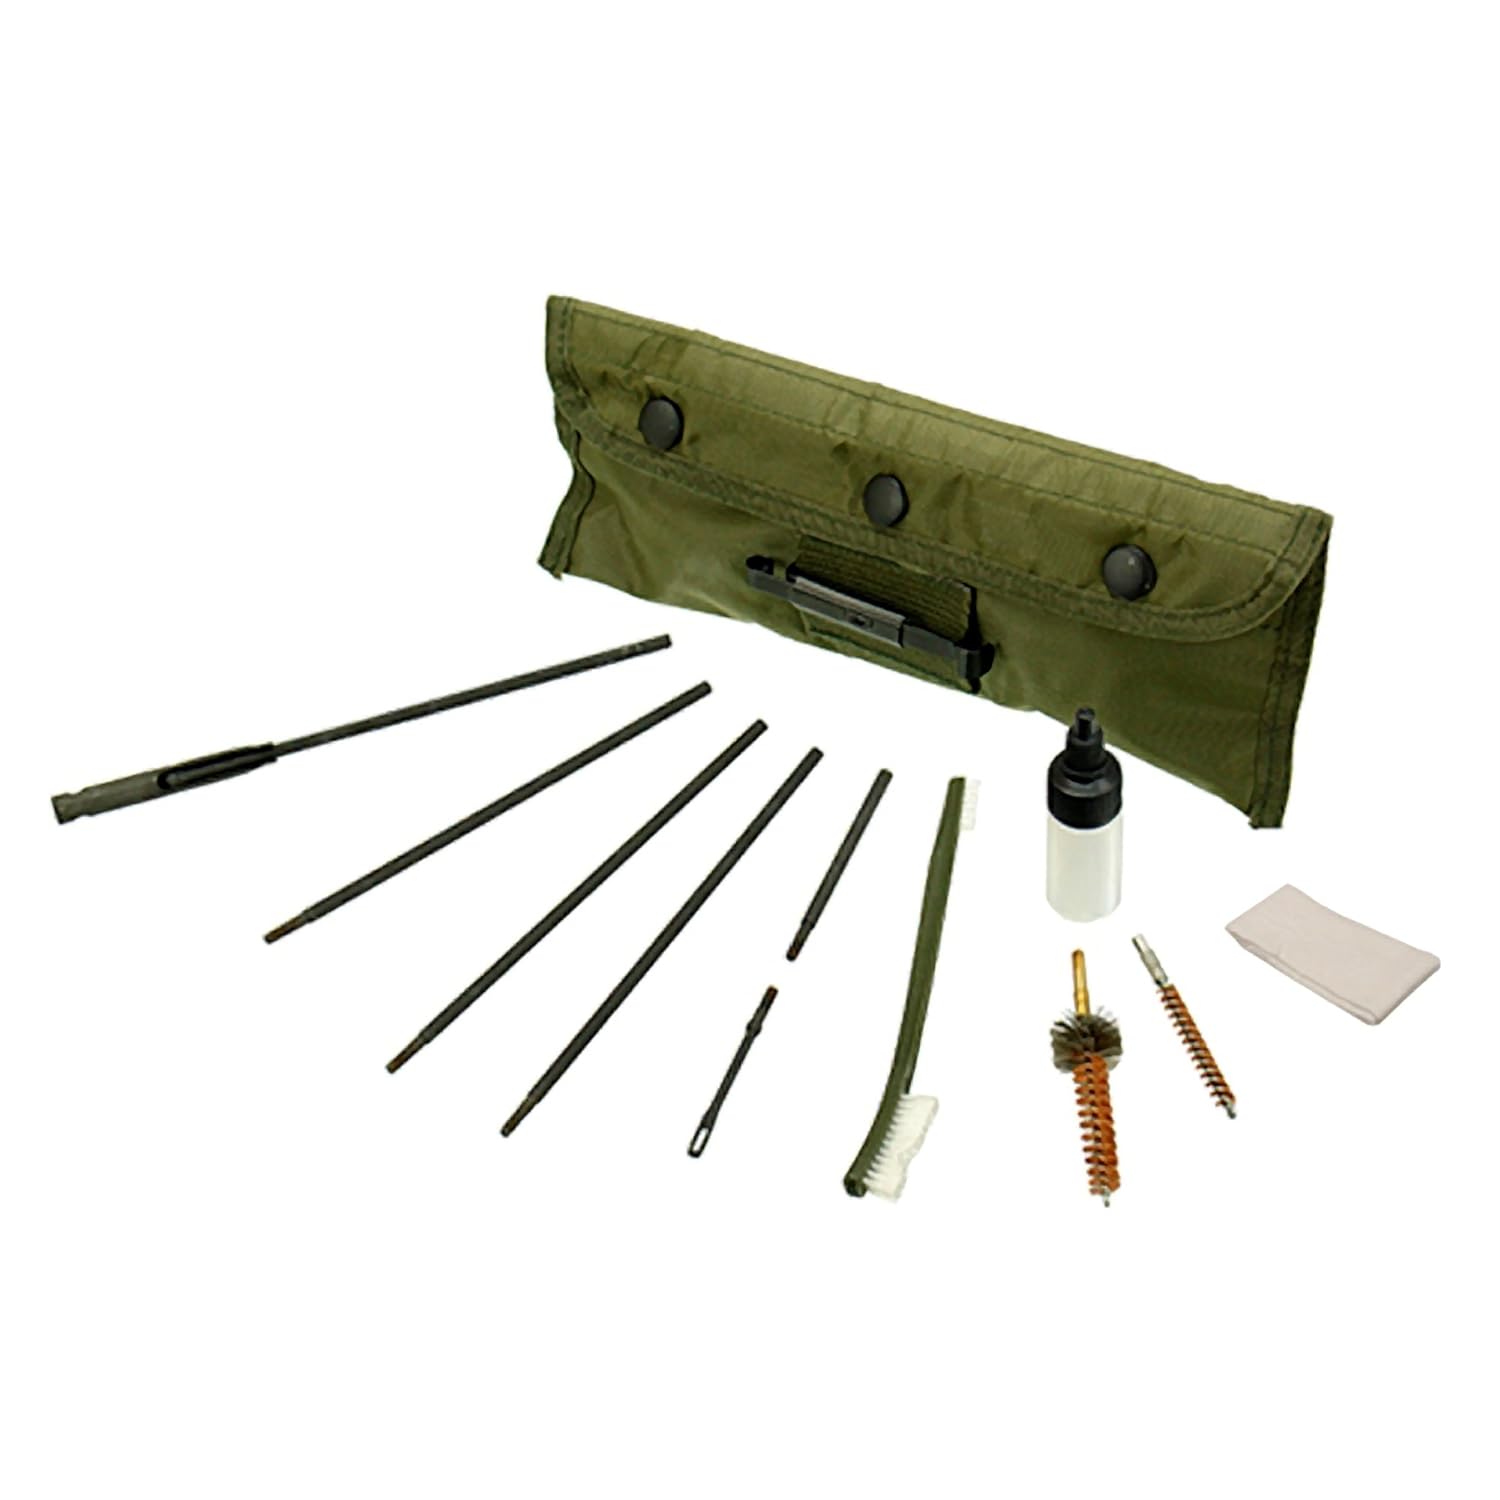
The rule of thumb: if the firearm is away from the home, the cleaning kit should be with it. You will find military issue nylon pouches (they have three snaps) are exceptionally useful for these individual kits. They hold all of the rods (broken down), your brushes, patches, and a small bottle for your oil. This photo shows an issue kit you can order from www.amazon.com for $16.20 called a UTG Model 4/AR15 Cleaning Kit Complete with Pouch
Use your creativity and your imagination to make what you want and tailor it to your use. Bottom line: your weapon can’t take care of you unless it is properly taken care of. You can be smart and use some of these tips to lessen the bite to your wallet. Just don’t cut corners when it comes to maintenance. When you’re done at the range, either take it down and clean it there, or take it home and clean it right away. Practice hard, clean those firearms, and keep in that good fight! JJ out!