Seeds need perfect growing conditions to grow healthy: water – allows the seed to swell up and the embryo to start growing, oxygen – so that energy can be released for germination, and warmth – germination improves as temperature rises.
Starting longer growing varieties like herbs, broccoli, cauliflower, and onions can greatly benefit from indoor growing methods. This gives the gardener a headstart and helps to control the growing environment.
A Step-By-Step Guide for Starting Seeds Indoors
Home gardeners can start vegetable and flower seedlings indoors between 4 to12 weeks before the last average spring frost in their area, which means it’s time to get started! Above all, start with good seeds. At Ready Gardens, we prefer time-tested heirloom varieties. These plants have been shown to have outstanding flavor and good harvests. Heck, if these seeds were good enough for my grandparents, they’re good enough for me. As well, you want to ensure that your seed starting mix has nutrients to feed young plants when they start growing their true leaves. Adding perlite and vermiculite can do wonders for emerging seedlings.
- Fill a flat or other container with moist, sterile germination mix. Add enough mix to fill the container within an inch of the rim. Gently pat the soil down for even distribution.
- Plant seeds according to their growing instructions. Some seeds can be planted in rows or scattered onto the soil’s surface. Typically, seeds need to be planted at 1/2 inch below the soil surface and covered with soil.
- With a spray bottle filled with water, water lightly until the soil has proper moisture. Take precautions so that the soil is not waterlogged.
- Add a small layer of vermiculite to the top of the soil. This reduces moisture loss and cuts down on mold growth.
- Label the flat and cover your newly planted seeds with plastic wrap until the first sprouts emerge. This avoids drying out of the soil.
- Set seeds in a dark area that is not drafty. Seeds need a warm area to germinate.
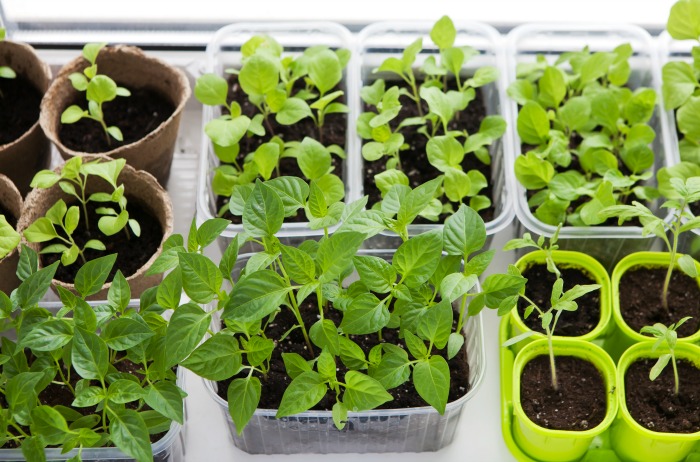
- Once seeds have germinated and sprouts appear, transfer the containers to a sunny spot or place under grow lights. Make sure the seedlings get up to 16 hours of sunlight a day. If seeds do not get enough sunlight, they grow long and leggy and this will not produce the healthiest plants. Full spectrum grow lights can assist in giving plantlings adequate light needed for growth. Water as needed.
- When plants have grown to the proper size, you need to begin hardening them off and get them accustomed to outdoor living. Harden off gradually, so that seedlings become accustomed to strong sunlight, cool nights and less-frequent watering over a 7-10 day period. On a mild day, start with 2-3 hours of sun in a sheltered location. Be sure to protect seedlings from strong sun, wind, hard rain and cool temperatures.
- Once plants are hardened off, plant them in the garden according to the seed packets instructions.
Simply by providing seeds with comfortable temperatures, adequate soil moisture and time, your plants will establish strong root systems and, in time, grow big enough for replanting. Following these steps will ensure planting success.
I would add these little helpful “tricks” to starting seeds.
1- Many seeds will benefit from having spent some time in the deep freeze to mimic nature’s winter freezing conditions that seeds “in the wild” go thru. (Keep in mind that the world’s most sophisticated seed banks are kept at very low temps to preserve them, and the seeds do just fine.)
(but things like orange seeds, lemon seeds, etc, and other “wet seeds” will die from freezing)
As an interesting side note, the AGE of seeds is not always a detriment to them, because in recent history, researchers found and GERMINATED some grain seeds found in a desert cave (hot and dry climate) that were about 2000 years old.
2- You can buy (for about $12 on Ebay, etc) one of those electric seed tray heating mats… I got one, and it uses only 18 watts, and keeps the entire seed tray at about 85F. If your seeds get damaged at that temp, then just put something like a few pencils under the bottom of the seed tray for a small “air gap” to release some of the heat.
———————–
Those heating mats, also make a great FOOT warmer in the home or office.
———-
Seeds germinate better with a bit of warmth, and if you want to warm them without GRID power, then it will be a bit trickier to do this, but you CAN do it, with putting the seed tray on a SHEET METAL shelf, with a kerosene lamp or lantern UNDER the seed-shelf. BUT you will have to do a SUPER GOOD JOB of MONITORING the temperature of the bottom of the seed tray to make sure you don’t KILL your seeds with TOO much heat “building up”. So you will have to experiment with setting distances between the lamp and the seed shelf over it, AND it would be a GOOD idea, to put a layer of ceramic tiles under the seed tray, to act as a “heat spreader” so you don’t get a “hot spot” right over the lamp.
The kerosene lamp will also produce Carbon Dioxide that is helpful for plants that are already growing.