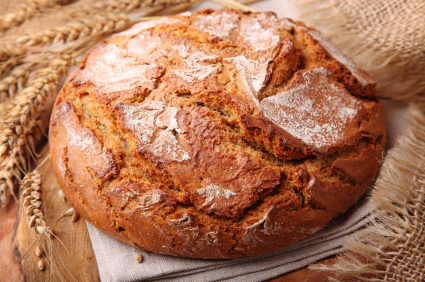
 I admit that before I became interested in a more self-reliant lifestyle, I really had no interest in making bread. I could just drive down the road and pick some up at the local grocery store for $2.oo. However, since prices are rising and budgets must be stretched, I have begun to expand on my abilities. Bread baking, as simple as many think it is, was my biggest challenge. Each time that I attempted, I would fail miserably.
I placed a lot of stress on myself to make bread because after all, if I am a preparing for a long-term emergency and needing to care for my family; how can I care for them if I can’t make a stinking loaf of bread? My failures were mainly due to not understanding the chemistry aspect of making bread. I had tried all types of bread making, alas with no results to be proud of. So, I went back and started again with different recipes.
I started with the most basic, no-knead recipe because everyone says that a 4 year old can do it, so I should too, right? With reluctance, I made the dough and set it aside. And then, something happened – the dough had risen and I could see and smell the yeast working. This recipe was like finding a pot of gold after a long journey. The bread came out perfectly crunchy on the outside and soft and moist on the inside. I finally had my eureka moment as far as bread baking was concerned. So for all the bread baking challenged, this one’s for you!
No Knead Bread Recipe
Makes 1 loaf of bread
- 3 c. unbleached or whole wheat flour
- 1/4 tsp. yeast
- 1 1/2 tsp. salt
- 1 1/2 c. warm water (110 degrees F)
- Mix all ingredients together until the ingredients have been incorporated (The dough will be very soft and sticky).
- Cover with plastic or put dough in a covered tupperware container and let sit for 18 hours. My microwave serves as the resting spot for this step.
- After 18 hours, take dough and set it on a floured surface. Dampen hands with a little water (this keeps the dough from sticking to you), and shape dough.
- Allow dough to sit another 1 1/2 – 2 hours.
- Bake in a covered dutch oven or baking dish in a preheated over at 500 degrees for 30 minutes.
- Remove cover; and reduce heat to 450 degrees and bake an additional 15 minutes.
- Allow to cool completely.
The greatest aspect of this recipe is that it is so user-friendly and versatile. This basic dough recipe can be shaped to make french bread, fried, grilled or even have additional ingredients such as seeds or berries to be added to the dough for a different variation. After I found this recipe, my interest in bread making has become my new hobby. I am now working with sour dough starters and finding more bread recipes to master. So… more recipes to come!

I fall under the bread baking challenged, so I am saving this recipe. Thanks!
I promise you, you will not be disappointed with this recipe. It’s so user friendly. Try it out and let me know how it goes. 🙂
Could you bake this in a clay cooker (Romertopf)? Its a covered dish until you take off the lid as per your recipe.
BTW, this is a great blog/website! Keep it up!
Any baking dish would do, but the clay cooker would help make a more rustic bread crust! Happy baking!
Tess tried the recipe the other day and it came out great! very pretty bread! I think I yard sold my clay cooker??? I had to miss matched pyrex dishes 1 as a lid the other as the dish! tacky I know but it still came out great! my first attempt at bread! great find thanks
Tess, thank you for this recipe. I made it; my sons loved it. I know it wasn’t rocket science, but golly I felt proud and confident and a little more self-reliant.
Hoping to find a way to make bread when the SHTF and grid is down. Any known ways?
Lived in ABQ NM for a short stint and saw the Isleta Indians used a igloo shaped clay oven that made the best flat bread I ever tasted. Don’t know that I would be capable of making an oven.
Hope to hear of a way! Thank you Tess for all your magnificent articles on this site!
I have had a lot of success with the no-knead bread recipes. You literally, set it and forget it until it’s time to put in the oven. Once I learned how to make this recipe, I was able understand more about why breads do the things they do.
If you are having a problem getting the breads to rise, here are some recipes where the bread doesn’t have to rise: https://readynutrition.com/resources/recipes-for-the-bread-baking-challenged_20112010/
Let me know how it turns out! And keep practicing, you’ll get it, I promise.
Thanks so much,
Tess