
Welcome back to week 2 in our Crash Course into Preparedness. Last week we discussed the basics of survival and gear needed for a short-lived event. One of the comments from last week’s class mentioned that it isn’t hard to prepare, you just have to start. I couldn’t agree more! My only addition I would make to this comment is in order to start you must prioritize your needs and know what you’re planning for. This week, we are taking the same concept from last week – prioritizing, planning and preparing to another facet of disaster planning and highlighting the more dirty side of preparedness – medical and sanitation needs.
Some of the greatest threats in an emergency occur after the disaster. Lack of accessible clean water following major disasters can quickly escalate and create secondary problems in a post SHTF situation. Additionally, those unsanitary conditions can exacerbate the spreading of diseases, infections and health risks. In this preparedness course, we will cover the most common issues that occur following a disaster that relates to hygiene, sanitary and medical condition.
Sanitation, good hygiene, and medical preparedness all go hand-in-hand. But as you will see after reading this guide, it takes a lot of planning and a lot of preparation. Simply put, there are many wrong turns a person could take in the aftermath of a storm and their health could suffer as a result. Therefore it is paramount that you understand the magnitude of these types of disasters and how to avoid them. As Ready Nutrition writer, Jeremiah Johnson noted in a recent article, “hygiene protects you from germs and diseases, as well as preventing the body from falling apart.” In the aftermath of disasters, this needs to stay at the forefront of our priorities.
In this week’s course, I have compiled lists of preparedness items you may need for these types of disasters, but in no way is this list comprehensive. There is always some other items that someone will need. Therefore, remember to prioritize your household’s needs! If someone in your home has a preexisting condition – prepare for that. If someone in the household has mobility issues – make sure they have supplies to help them get around, or if someone has a suppressed immune system – prepare accordingly.
We have a lot of ground to cover, and a lot of prepper lists to review, so let’s get started.
Why your water sources become contaminated after a disaster and why you should avoid them
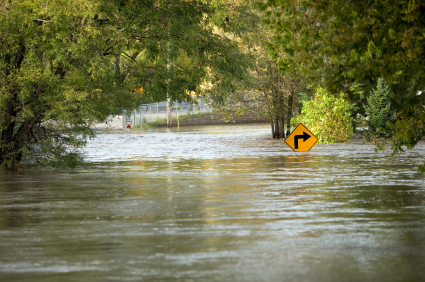 Water is one of the most necessary elements to sustain life, but when that water is dirty, it can quickly become one of the most dangerous. Following a disaster, municipal water lines will more than likely be damaged and can become contaminated with sewage, chemicals and, in particular, may also contain a number of pathogens that can cause illness. These contaminated waters harbor bacteria, different viruses, and fungi – all of which can make people very sick.
Diseases can be present in the water. Most notably, cholera, hepatitis A, typhoid fever, and Leptospirosis. If massive flooding occurs in the area and homes are damaged as a result, mold could also pose a serious health problem and exacerbate asthma, allergies, or other respiratory diseases like COPD. Mold can appear in as little as 24 to 48 hours after flood waters recede. Experts suggest not to touch it. Wear rubber gloves, wear a mask when handling it and if you are in a dwelling where there is mold, you should leave.
Those who have open wounds or rashes should also avoid the flood waters as they can quickly become infected. If the water lines are damaged, or if the damage is suspected, do not use municipal water sources for cleaning or drinking. Likewise, throw out any food that has come in contact with contaminated water. Avoiding contaminated water is your best bet, but at times unavoidable. Maintaining proper sanitation and hygiene will ensure your overall health and safety.
Fly infestations also pose a problem, and if the waste is left out in the open, then it will only lead to the susceptibility of epidemics such as Hepatitis A, cholera, typhoid or diphtheria. Having a means dispersing of human waste will ensure that in times of disaster, your family and neighbors will stay healthy.
As well, mosquitoes are notorious for harboring diseases. Some of which are:
- Dengue
- West Nile
- Zika
- Chikungunya
- St. Louis Encephalitis
- La Crosse Encephalitis
As well as a few others that mainly affect animals:
- Western Equine Encephalitis
- Dog Heartworm
So it’s important for homeowners in disaster affected regions to take certain measures to prevent the proliferation of mosquitoes. This requires keeping an eye out for things on your property that might contain even the smallest puddles of water. As well, experts are recommending that homeowners drain pools and if you see mosquitoes in larger areas of standing water to alert authorities.
Make sure you clear any trash or debris in your yards such as tires or cans and don’t leave any water out in flower pots or water bowls. It’s also a good idea to secure any leaky pipes you might have outside of your home, and clear out any leaves in your gutters. In some cases, you may need to fill or drain spots that tend to collect water on your property. As an added defense, build traps that will cull the local mosquito population.
If you are cleaning your home after a flood, make sure you follow these steps from the EPA on flood-related cleaning.
Sanitation
 No one really wants to discuss sanitation because it’s… well, an unpleasant and dirty subject. However, it is one of the most important areas to focus on when preparing for a disaster.
Most disasters cause sanitation nightmares simply because following a disaster, there is a lack of sanitation facilities or water lines have been damaged or crossed with sewage lines. This can bring on serious health risks.
Here are a couple of necessary facts you need to keep in mind.
- In the aftermath of a disaster where water sources are compromised, people within a 50-mile radius could be adversely impacted by illness and disease just if one person handled the trash improperly. Let that sink in.
- If the you-know-what has hit the fan, you must be aware that more people die after a disaster due to poor sanitation than from the disaster itself. This is due to individuals not knowing where or how to properly expel waste.
- Infectious diseases from contaminated water can make certain groups very vulnerable – the very young, the elderly and people suffering from diseases that lower their immune resistance.
How to prepare for sanitation disruptions
When the trash cannot be picked up, it must be burned or buried by you; however, municipalities cannot risk contamination to the water source or soil from people who incorrectly bury their debris, so it is important to know how to properly dispose of your waste products and stay clean, as well. Typically, city officials will provide information on this after a disaster occurs.
One of your first lines of defense is to keep hands clean during an emergency to prevent the spread of germs. If your tap water is not safe to use, wash your hands with soap and water that has been boiled or disinfected. If needed, a temporary hand washing station can be created by using a large water jug that contains clean water.
How to clean water
Bring your drinking water to a rolling boil for 15 to 20 minutes before consumption or for cleaning purposes. At altitudes above one mile or 2,000 meters, you should increase the rolling time to three minutes. For an added measure, after boiling, you can chemically disinfect the water with chlorine bleach (minus additives). Use 16 drops of chlorine bleach per gallon, or 4 drops per quart of water.
The reason for taking added measures after you boil your water is that many water-borne diseases like giardia and cryptosporidium tend to encyst and can survive a chemical disinfection, especially with chlorine. Most of your one-celled creepy-crawlies will bite the big one with it, but boiling is the only surefire method when you don’t have an advanced water filtration system available.
Calcium hypochlorite (HTH, also known as “pool shock”) is another method to use. The concentrations are different per the manufacturer, but you can reconstitute it and make a slurry with a one-liter bottle and a teaspoon of the HTH. Then you follow the ratio for chlorine drops as provided above, keeping aware that it will deteriorate over time. Source
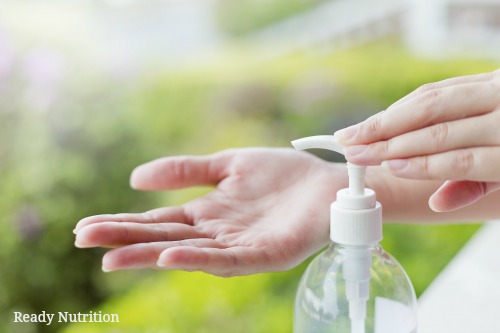
Wash your hands
Now that the water is clean, washing hands with soap and water are the best way to reduce the number of germs on the skin. If soap and water are not available, use an alcohol-based hand sanitizer that contains at least 60% alcohol. Alcohol-based hand sanitizers can quickly reduce the number of germs on hands in some situations, but sanitizers do not eliminate all types of germs. According to the CDC, you should wash your hands after the following:
- Before, during, and after preparing food
- Before eating food
- After using the toilet
- After changing diapers or cleaning up a child who has used the toilet
- Before and after caring for someone who is sick
- After blowing your nose, coughing, or sneezing
- After touching an animal or animal waste
- After touching garbage
- Before and after treating a cut or wound
Make a sanitation kit
As well, you want to ensure your house has a way of dealing with sanitation issues. Having a sanitation kit that is ready in times of disaster is essential to keeping your family and neighbors healthy. These kits can fit comfortably into a bucket, are affordable, and will not take up much space. Additionally, being educated on how to properly dispose of waste is a key factor in keeping everyone healthy during a disaster.
Some suggested sanitation supplies should be added to any short or long-term emergency kits are:
- Disposable bucket or luggable loo
- Toilet paper (two weeks worth)
- Rubber gloves
- Garbage bags with twist ties (for liners of toilets or luggable loo)
- Bathroom cleaner
- Cat Litter or absorbent material such as saw dust or dirt
- Baby wipe
- Soap
- Baking soda can be used to help eliminate odors
- Vinegar
- Bleach
- Shovel
- Women’s sanitary needs
Dispose of Waste
Properly disposing of waste products keeps water sources clean and cuts down on illness and disease. If city water is still available, flush conservatively. Grey water such as used dish water, bath water or water for cooking can be used to flush the toilet. If water lines are damaged, or if the damage is suspected, do not flush the toilet.
If water services are interrupted, an easy way to utilize the toilet and keep it clean is to:
- Clean and empty the water of the toilet bowl out.
- Line the bowl with a heavy-duty plastic bag.
- Once the bag has waste inside, add a small amount of deodorant such as cat litter, as well as disinfectant and securely tie the bag for disposal.
- A large plastic trash can (lined with a heavy duty bag) can be used to store the bags of waste.
- Once trash services begin, the city will come and collect these.
If a portable camp toilet is used, the above mentioned can also be used. However, if the trash crews are coming, carefully secure the waste bag and store in a designated trash can to be collected. If the trash crews are not coming in a given amount of time, the bag of waste will need to be buried (see the proper way to bury waste below).
Officials say to avoid burying your waste, but sometimes it is necessary. However, if the waste is not properly taken care of, pollution of water sources will lead to illness and disease. It also attracts flies and insects which will spread the disease further. Understand that burying feces takes up to a year to decompose. Therefore, finding the right spot to bury your feces is crucial. There are biodegradable bags that a person can put their waste into. These can usually be found in the camping department of outdoor stores, or on the Internet. The bags assist the waste in decomposing faster and assists in preventing the waste from hitting major water sources. If a person does not have one of these handy bags available, the feces should be buried in “catholes” far away from water sources, campsites and a communal spot where there are a lot of humans. If you find yourself in a situation where toilet paper is not available, you may have to resort to a more natural method of staying clean. Below is a list of toilet paper alternatives for an emergency situation.
Toilet Paper Alternatives
- Leaves
- Phone books
- Unused coffee filters
- Corn cobs (That’s right- Corn Cobs)
- Dilapidated kitchen towels (no longer used for cleaning).
- Bed linen strips
- Mail order catalog
Hygiene
It is important to continue regular hygiene habits during an emergency. As well, a woman’s personal hygiene and ensuring children are clean is essential in making sure sanitation-related illnesses do not occur.Habits such as brushing your teeth, washing your face, combing your hair and even washing your body with a wet washcloth. This will provide a sense of normalcy, help prevent the spread of disease, as well as help to relieve the stress brought on by the disaster.
In a pinch, water can be heated outside using a sun visor for a vehicle or a sun oven. Use filtered potable water or fresh rainwater during times of emergencies. To prevent sanitation-related diseases, do not use standing water.
SHTF laundry
If your home was damaged by flood water, you will need to disinfect your washing machine. Here’s how to do it:
- Set the washer to the largest load capacity and fill with hot water
- Add one cup chlorine bleach
- Set the washer to a full cycle with a hot water rinse. Allow washing machine to run through the entire cycle.
- Clean the exterior of the washer – top, front and sides – and all other surfaces in the laundry room with a solution of chlorine bleach and hot water. Rinse with clean water.
Additional Maintenance Tips:
- If the washer has been through a flood, have a technician check the appliance before cleaning and using.
- If a dryer has been contaminated by flood water, have it checked by a technician and then wipe down the drum and outside of the dryer with a solution of chlorine bleach and hot water. Always rinse well with a cloth dipped in clear water.
Once your washer is clean and ready for use, it’s time to get that laundry going.
- Sort clothes into appropriate piles.
- Check your care label to make sure garments are washable.
- If labeled hand washable only, then hand wash—do not put into the washing machine.
- If the garment is dry, brush off loose dirt and residue. Rinse in clean, cool water to remove mud and flood water. This will take several rinses until rinse water is clear. Work a heavy duty detergent (liquid) or paste of granule detergent into all stained areas. Let stand 30 minutes.
- Work a heavy duty detergent (liquid) or paste of granule detergent into all stained areas. Let stand 30 minutes.
- Follow care labels and wash in hottest water safe for the garment with detergent. Use bleach if recommended for the garment.
- Sanitize with a disinfectant. Always test on an inconspicuous seam to be sure it does not harm the garment. Add to washing machine before adding clothing.
Some disinfectants to try are:
- Liquid chlorine bleach (Clorox, Purex) if safe. Do not use on washable wools and silks. Follow directions carefully.
- Pine oil (Pine-O-Pine, Fyne Pine) is safe for most washable garments. Do not use on washable wools and silks since the odor will remain.
- Phenolic (Pine-Sol, Al-Pine) is safe for most washable garments. Do not use on washable wools and silks since the odor will remain. 1 Hang garments to dry.
Off-grid laundry is another option to consider
As well, you need to consider some off-grid laundry sources if your home has no power. Some items you will need are:
First, gather your supplies.
- Laundry soap of choice (liquid is easier to use in this case)
- Borax
- Baking Soda
- Hydrogen Peroxide
- Sturdy scrub brush
- Small bucket (I use a clean plastic kitty litter bucket)
- Good quality janitor’s mop bucket with a press wringer
- Large basin or clean bathroom
- Drying rack and clothespins (or method of choice)
- Separate clothing into small piles.
- In a large basin, add laundry soap and begin filling with water with the hottest water. Mix the soap into the water until incorporated.
- As water is still filling up in the basin, add laundry. Turn off the water when water covers the soiled laundry.
- Add any disinfectants and mix to incorporate.
- Allow laundry to sit for 30 minutes to an hour to soak.
- When ready to clean clothes, fill the second basin up with water and set aside.
- Using an agitator, scrub clothes to get all stains off.
- Rinse clothes in the second basin to remove soap.
- Ring out clothes and set on dryer rack to dry.
Prevention is the key to spreading communicable diseases, so prepare appropriately.
Medical
 Short-term disasters can bring on a myriad of medical situations and they can occur very quickly. Because of the disaster, roads may be impassable, or in some cases, the hospitals may be at capacity and cannot take in any more patients. With that in mind, it is important to know what the most common medical emergencies are and prepare accordingly for them.
In short-term disasters, prepare for water-related illnesses. This will be very common given the close proximity to contaminated water sources.
In The Prepper’s Blueprint, it states, “The relationship between communicable diseases and disasters exist and merits special attention. When there is a short-term emergency, there is an increased number of hospital visits and admissions from common diarrhea-related diseases, acute respiratory infections, dermatitis, and other causes. These type of medical issues are due to those coming in direct contact with flood waters contaminated by oil, gasoline, or raw sewage. These contamination factors will cause irritation to skin and a host of other medical conditions.”
In longer-term disasters, burns, cuts, rashes and secondary infections will also be very common medical emergencies to prepare for. Folks, these are the disasters you will likely face and it is imperative that you prepare for this with proper medical supplies and knowledge.
I realize that there are a lot of medical conditions to think about. The best approach is to look at the basics and prepare for those. Many medical items can be used for multiple disasters, so take comfort in this and prepare accordingly.
Build the Ultimate 1 Year Medical Supply with These First Aid Basics
Experts suggest that each home have a basic medical supply that is unique to your family’s needs. Therefore, keep any pre-existing conditions and allergies any family members may have, as well as the above list of the most common medical conditions that hospitals see. It is within your best interest to ensure that you have any and all necessary medications that require prescriptions before an emergency happens.We all have our fair share of band-aids and antibiotic ointment, but do you have medical supplies that can help with true medical emergencies?
The following list is your basic medical preparations broken into sections of the need to help in your organization.
Hygiene
- Laundry detergent
- Disinfectant (bleach, pine-sol, etc.)
- Soap
- Shampoo
- Liquid antibacterial hand soap – 20
- Disposable hand wipes – 20
- Antibacterial hand sanitizer – 20
- Feminine items – 12 packages
- Extra baby needs (diapers, wipes, pacifiers, bottles, medicine, etc.) – in quantity
- Exam gloves – 5 boxes
- Rubber cleaning gloves
- Extra mops and brooms
- Large plastic bins (for doing laundry, clearing away debris or packing precious items in a pinch)
Essential Medical Tools
- Trauma shears
- Pen light or small flash light
- Scalpel with extra blades
- Stethoscope
- Irrigation syringe
- Tweezers
- Thermometer
- Foam splint – 2 per family member
- Thermometer
Over-the-Counter Products
- Aspirin or non-aspirin pain reliever (for adults and children) – 5 bottles
- Stool softener – 5 bottles
- Electrolyte powder – 3 boxes
- Cold/flu medications – 2 boxes per family member
- Expectorant/decongestants – 3 per family member
- Hydrocortisone – 3
- Miconazole/anti-fungal – 3
- Syrup of Ipecac and activated charcoal – 2
- Eye care (e.g., contact lens case, cleansing solution, eye moisture drops) – 3 per family member
Natural Supplements
- Potassium iodide tablets – 1 box per family member
- Multivitamins
- Vitamin C
- Ginger
- Garlic
- Ginseng
- Colloidal silver
Wound Care
- Disinfectant (Betadine, isopropyl alcohol, iodine, hydrogen peroxide, etc.) – 2 per family member
- Band-aids – 3 large boxes in assorted sizes
- Antibiotic ointment – 5
- Instant cold and hot packs – 10
- 1 week of prescription medications – as many as you are able to get with your prescription
- Ace bandages – 10
- Non- stick gauze pads in assorted sizes (3×3 and 4×4) – 10 boxes
- Sterile roller bandages – 5
- Surgical sponges – 5
- Adhesive tape or duct tape – 5
- Steri-strips – 5
- Moleskin – 3
- Respirator masks – 4
- CPR micro shield – 1 per family member
- Suture kit – 3 per family member
- QuikClot® compression bandages – 2 per family member
- Tourniquet – 2
- Thermal Mylar blanket – 1 per family member
- Antibiotics
*These are your minimum quantities. If you are able to do so, prepare for more.
One cannot become proficient at something without study and application. Going as far as to take medical courses in community colleges, local county extension offices, local fire departments, and with veterans groups, along with other civic clubs and organizations can give you a great edge on acquiring knowledge on medical emergencies and how to treat them. It should go without saying, but stock up on medical manuals like:
- The Survival Medical Handbook
- Herbal Antibiotics: Natural Alternatives for Treating Drug Resistant Bacteria
- Prepper’s Natural Medicine
- Wilderness Medicine
- Medicine for the Outdoors
- A Barefoot Doctor’s Manual
- Field Guide to Wilderness & Rescue Medicine
- Wilderness Medicine, Beyond First Aid
Taking medical courses would be very beneficial in preparing for this type of emergency. The Fire Department, American Red Cross or Medical Centers are local resources that offer classes to assist in medical emergencies. To further prepare, find websites online that deal with first aid care and go through each injury to see what medical instruments and items are needed.
Customize Your Supplies
Many believe that a basic store-bought medical kit will provide for all of their medical needs, but these kits tend to be overloaded with unneeded items (i.e., 500 band aids). Buying your own medical supplies allows you to customize your kit to fit your family’s unique needs and is more economical. In fact, you can purchase many of these items at your local Dollar Store to save money. Customizing your family’s medical supply gives your family members the best chance at being cared for when a medical emergency arises. Further, take your preparedness a step further and organize your medical preps and create medical response packs for quick acting.
Store a first aid kit in the car (being careful with heat sensitive items) and also tuck some medical supplies into your 72-hour bag as well as at work. This way, you can be ready to deal with medical emergencies wherever they happen to occur.
Storing Medical Supplies
How you store your first aid supplies is every bit as important as having the supplies in the first place. Medicines can lose potency or spoil if they are subject to moisture, temperature fluctuations, and light. For example, aspirin begins to break down when it is exposed to a slight amount of moisture.
Unless the instructions indicate otherwise, store medications in a cool, dark place that is out of the reach of children. However, you still want to store the medical supplies in a place that is easily accessible to adults, who may need to respond very quickly in the event of a medical crisis.
Check expiration dates periodically to ensure the medicines are still good to use. While most medicines lose potency once they’re past the expiration date, there are a few that will actually make a person extremely ill if taken after it spoils. For example, tetracycline antibiotics that have spoiled can cause a severe, sometimes deadly, kidney ailment.
Signs of Expired Medicines
Although there is data that states most medicines can last longer than their expiration dates, it is important to understand that using medicine years past its expiration date can lose effectiveness and in some cases, change its chemical makeup. If you are in a survival situation where your life depended on an outdated drug, then it is wise to follow the cliché “better safe than sorry”.
Knowing the signs of expired medicine can help indicate when new items are needed.
- Creams or ointments which are discolored or have changed in texture.
- Creams or ointments which have cracked or separated.
- The medicines smell has changed since it was opened.
- Tablets are broken or chipped and have changed color
Bear in mind, there are some medications that should never be used after their expiration and could have severe consequences for patients. These include:
- Anticonvulsants – narrow therapeutic index
- Dilantin, phenobarbital – very quickly lose potency
- Nitroglycerin – very quickly lose potency
- Warfarin – narrow therapeutic index
- Procan SR – sustained release procainamide
- Theophylline – very quickly lose potency
- Digoxin – narrow therapeutic index
- Thyroid preparations
- Paraldehyde
- Oral contraceptives
- Epinephrine – very quickly lose potency
- Insulin – very quickly lose potency
- Eye drops – eyes are particularly sensitive to any bacteria that might grow in a solution once a preservative degrades.
What if you don’t have enough medical supplies?
Now, let’s take this a step further. What if you prepared your food and water for an emergency, but completely forgot about getting medical supplies? (It’s hard to remember everything when you’re planning for a disaster) There are some alternatives that you may be lucky enough to have in your pantry to use.
Some of your kitchen staples may have some medicinal value. For instance, did you know you can make an antiseptic (first discovered during World War I) made of a diluted solution of baking soda and bleach? It’s called Dakin’s Solution and has been proven to kill most bacteria and viruses. As well, vinegar, baking soda, baking powder and salt have medicinal values.
Honey has become a poster child for an alternative to antibiotics can fight multiple species of bacteria, fungi, and superbugs, making it a viable alternative to antibiotics.
As Ready Nutrition writer, Jeremiah Johnson recently wrote, “Honey is also good for wounds/abrasions/cuts of the mouth, as it is a demulcent that soothes abraded tissues, and it also is a medium that microbes do not live in. Who doesn’t remember the time-honored honey and lemon mixture for a sore throat? The thing of it is: it works, and if it works it should be employed. Read more on how to use honey to treat wounds.
Having access to health-inducing herbs is another essential for wound care. Herbs such as oregano, garlic, lavender, and thyme can help protect a wound from infection and promote healing. Along those lines, writer, Jeremiah Johnson recommends every prepper have the Three G’s: Ginger, Garlic, and Ginseng in their natural medicine cabinet. Further, knowing which herbs can be used for natural pain killers is also paramount in your medical preparedness knowledge. Some pain reducing herbs to add to your herbal first-aid kit are:
- Aloe (Aloe vera)
- Calendula (Calendula officinalis)
- Comfrey (Symphytum officinale)
- Gotu Kola (Centella asiatica)
- Tea (Camellia sinensis)
- Lavender (Lavandula angustifolia)
Common pantry items can also be used to help bleeding wounds clot. Many have found that cayenne pepper is an effective alternative and natural version of QuikClot. Cayenne pepper contains an active ingredient, called capsaicin, which has analgesic (pain relieving) properties and various other medicinal uses.
As well, boiled and sanitized torn sheets can be used as bandages. Or, if the cuts are minor and you have access to an herb garden, consider placing a sage leaf or lamb’s quarters on the cut as a natural bandage.
In an extended disaster, bacterial infections and viruses are likely to be one of the reasons that people will die.
Historically, essential oils have been used as a natural therapy to relieve symptoms when modern-day medicine was not available. The most amazing aspect of essential oils lies in their ability to effectively kill bad bacteria while leaving good bacteria alone! Rather than targeting one symptom, as Western medicine does, it targets multiple symptoms.
There are two types of essential oils you should stock up on for SHTF planning:
Antibacterial – Due to the increase of antibacterial resistant illnesses, many are turning to essential oils such as basil, cassia, cinnamon, clove, cypress, eucalyptus, geranium, lavender, lemon, marjoram, melaleuca, myrrh, orange, oregano, peppermint, rosemary, tea tree, and thyme.
Antiviral – Oils that have been studied to help control viral infections include: basil, cassia, cinnamon, eucalyptus, frankincense, lemon, lemongrass, marjoram, Melaleuca, myrrh, oregano, and thyme.
I started out with a simple beginner’s essential oil kit and have found it of great use! Some more popular ways of using essential oils are aromatherapy, herbal soaks, compresses, tinctures, and salves.
Surviving Disaster-Related Diseases
 In reality, the aftermath of a disaster is always to hardest to survive. We tend to find ourselves in third-world living conditions – off-the-grid, poor water conditions, lack of proper sanitation and poor diet.
Those conditions can create the perfect storm for outbreaks of disease and infection. And if you find yourself living in close proximity to others, those diseases can quickly spread, thus setting the stage for an epidemic.
Outbreaks
Let’s cut to the chase, epidemics are quite common following certain disasters. According to this publication, these are the most common diseases that follow a disaster:
- Diarrhea-related illness (cholera, dysentery)
- Leptospirosis
- Hepatitis
- ARI (pneumonia/influenza)
- Measles
- Meningococcal meningitis
- TB
- Malaria
- Dengue fever
- Tetanus
Many believe the misuse of antibiotics in the past has led to the dangers of super bugs such as the spread of MRSA and MERS virus. In fact, nearly all significant bacterial infections in the world are becoming resistant to commonly used antibiotics. This means that our current medical safety nets will be much smaller in the near future. Even the smallest cuts could pose a danger to our health.
To add insult to injury, the disease typhoid which is spread from contaminated food and water is also becoming resistant to antibiotics and could soon become an out of control nightmare. Why am I telling you this? Because superbugs are everywhere now and experts warn that “it’s almost too late.” In the wake of a disaster, we immediately fall back on medicines that have worked in the past. If we find ourselves with an infection and antibiotics don’t work, then a secondary infection will set in and your fate is sealed.
Phases of outbreak and classification of infectious disease
Infectious disease transmission or outbreaks may be seen days, weeks or even months after the onset of the disaster. Three clinical phases of natural disasters summarize the chronological public health effects on injured people and survivors:
Phase (1), the impact phase (lasting up to 4 days), is usually the period when victims are extricated and initial treatment of disaster-related injuries is provided.
Phase (2), the post-impact phase (4 days to 4 weeks), is the period when the first waves of infectious diseases (air-borne, foodborne, and/or water-borne infections) might emerge.
Phase (3), the recovery phase (after 4 weeks), is the period when symptoms of victims who have contracted infections with long incubation periods or those with latent-type infections may become clinically apparent. During this period, infectious diseases that are already endemic in the area, as well as newly imported ones among the affected community, may grow into an epidemic.
When an outbreak occurs, those living in cities or in close proximity to others will be more at risk of contracting illnesses and spreading them. Any pregnant women, infants, elderly people, or those with chronic medical conditions are also at risk and could be the first of the population to contract the contagious illness. If an epidemic approaches, there could be long-lasting repercussions of such a disaster. The worst-case scenario in all of this is if the outbreak is widespread and extremely contagious drastic changes could be made to isolate the outbreak itself.
- Challenges or shut downs of business commerce
- Breakdown of our basic infrastructure: communications, mass transportation, supply chains
- Payroll service interruptions
- Staffing shortages in hospitals and medical clinics
- Interruptions in public facilities – Schools, workplaces may close, and public gatherings such as sporting events or worship services may close temporarily.
- Government mandated voluntary or involuntary home quarantine.
While these are extreme points, I want to make sure you are prepared for a worst-case scenario and knowing what to expect will help you in your efforts. As I have mentioned, with any type of disaster or emergency, the responsibility falls more heavily upon our shoulders to ensure you can meet our needs. Instituting preventative measures in the home could also help you better prepare for injured or infectious family members.
- Taking proper illness precautions – avoid touching your mouth, nose, and eyes during any pandemic.
- Create a sick room for the home.
- Keep your immune systems up by getting lots of sleep, having a good diet, exercising and taking vitamins and antioxidants to protect your health.
- Stay inside and avoid contact with others.
- Get pandemic supplies to have on hand at a moments notice.
Some items to consider when stocking a sick room are:
- Tyvek protective suit and shoe covers
- Plastic sheeting
- Bed with linens, pillow, and blanket
- Small wastebasket or a bucket lined with a plastic garbage bag.
- Gallon-sized zip-loc bags
- Pitcher or large bottle for water
- Large plastic dishpan
- A portable toilet
and human waste bags
- Clipboard with paper and a pen for writing in the daily log.
- Clock
- Hand crank or battery-powered radio
- Good source of light
- Flashlight with extra batteries
- 1 clothing hamper or a garbage can that is lined with a plastic garbage bag used to collect soiled clothing and bedding items before they are washed.
- A bell or a noisemaker to call for assistance.
- Thermometer
- Tissues
- Hand wipes or a waterless hand sanitizer
- Bleach or disinfectant
- Cotton balls
- Rubbing alcohol, disinfectant or bleach
- Measuring cup capable of holding 8 ounces or 250 ml
- Over-the-counter medications for use in the sick room
- Protective eye gear
- Protective clothing
- Disposable aprons or smocks (at least 2 cases)
- Duct tape
for sealing off doorways and vents
- Latex household disposable cleaning gloves
- Disposable nitrile gloves
(2-3 boxes)
- Garbage bags
- Trash can
- N95 masks
or N100 respirator masks for use when the sick person is coughing or sneezing
To conclude, there will always be the threat of completely unanticipated disasters, but your overall understanding of the disasters we face and the dangers that lie in the aftermath will help you maneuver through these types of emergencies.
Course Discussion
We all have a way to help others prepare. One of the most wonderful things you can do is to help someone prepare. New preppers, if you have questions, leave them in the comment section and as a community, we can help to answer them. You’re not in this alone. I know this information provided is a lot to take in, just pace yourself and we are all here for you if you need it.
Sign Up For This Week’s Giveaway!
To help some readers get prepared for sanitation-related emergencies, we’re giving away a copy of The Prepper’s Blueprint – widely popular and highly rated preparedness manual and a sanitation kit.
All you have to do is sign up for our newsletter and leave a comment in one of our weekly National Preparedness articles about what you feel the most important aspect of being prepared is in the bottom of the article. Good luck everyone!
This article was originally published at Ready Nutrition™ on September 11th, 2017


Narrowing it down to ONE important thing? Impossible. But I will say, not becoming complacent. As we saw in Irma, disasters have a mind of their own. They will strike -when and where is not of our choosing. I think my most important tip is actually one that a professor gave me in grad school “Redundancy is the essence of learning”. Practice, review, re-read, rinse and repeat. Then when the inevitable happens, it is so ingrained that it will be automatic.
Should puncture wounds from underwater hazards be treated like dog bites? Are there any alternative remedies for tetanus?
NebrJo,
If your wound was exposed to flood water, I would plan for the worst case scenario and use some precautionary antibiotics. See a doctor and look into getting a tetanus. There are a lot of infectious diseases that are in flood water. Here is a list of potential diseases you could get exposed to: https://www.cdc.gov/disasters/disease/infectious.html
As far as an alternative for a Tetanus shot, there are some alternatives. Rather than doing a poor job explaining them, this article has some good info on the subject. https://www.westonaprice.org/health-topics/ask-the-doctor/what-to-do-about-tetanus/
I would also talk to your doctor ahead of time about alternatives so you know ahead of time.
tetanus is the one vaccine I will take…however, it is difficult to find a stand alone tetanus vaccine…nowadays, you have to take the Tdap
Disasters don’t make reservations.
Keep your tetanus up to date. Period.
They’re good for 10 years for minor cuts and punctures, 5 years for more major deep or dirty wounds. Get a booster at least every 10th year. The only likely harm to getting boosters every 5 years is to your wallet.
Keep track of your last one, and get the booster on time, ever time.
Untreated tetanus infection is lethal in 10% of cases, and even a non-fatal infection is extremely painful, and may take months to recover. It killed 56,000+ people worldwide in 2015.
After the window of initial injury (+/- 72 hours) when a booster will still work, there’s nothing anyone can do to turn it around if you get it.
Clostridium tetani spores are found in soil, dust, feces – and flood waters.
Once they enter a wound, they grow into a bacterium that inhabits nerve endings, and produces tetanospasmin as a by-product, which sends your muscles into severe spasms. At best, you can treat the symptoms. The muscle spasms are so severe they can break bones, including the spine.
At worst, in a fatal case, you’ll die of dehydration and suffocation with every muscle in your body tensed as taut as a bowstring, back arched, and with only your head and heels on the bed, and eventually suffer respiratory paralysis. And awake and aware the entire time, a most gruesome (and entirely preventable) death.
Or, you can get your booster shot in a timely manner.
Dealer’s choice.
And Tess, great article!
Thanks, Aesop!
Cut down on your current use of antibacterial wipes, detergents, washes. While we still have access to medicines. Exposing your children to germs helps them build up a healthy immune system. Let them get dirty, have pets. Germophobia has lended itself to the growth of superbugs, as well as the overuse of antibiotics.
Everyone gets “exposed to germs” 24/7/365. Especially kids, unless they live in an actual sterile bubble. Why d’ya suppose cold and flu season coincides exactly with the opening and closing of the traditional school year, when all the kids cross-pollinate and bring crud home to mom and dad; and peaks around the holidays, when everyone gets together to share their kids’ cooties with the whole clan?
Wipes, detergents, and washes, along with clean water and flush toilets, are the reason we don’t have disease outbreaks of hepatitis, cholera, dysentery, etc., and life expectancies in the mid-50s, which is also the IQ behind not using antibacterials for their intended purpose.
The idea that killing germs is bad is counter-factual nonsense. Proof of that is that even the people that spout it don’t eat off their toilet seats.
What’s creating superbugs is pumping antibiotics into livestock feed by the ton, and idiots pestering their doctor for antibiotic prescriptions for viruses, which no antibiotic ever invented will fix. And by the idjits that stop their antibiotic course early, after killing only part of the problem, and leaving the rest of the bacteria sensitized and resistant.
Washing your clothes, your body, and your hands before you eat, and after you poop, only keeps about ten or twenty third-world disease outbreaks at bay, like it has for the last century or so. Look up disease rates from a century ago, and tell me about the “good old days”.
Florence Nightengale and Clara Barton figured all this out empirically in two wars, starting even before Pasteur figured out the reason scientifically, which was about 170 years ago. Let’s don’t be going backwards in intelligence, and time.
I don’t disagree with you, Aesop…
“What’s creating superbugs is pumping antibiotics into livestock feed by the ton, and idiots pestering their doctor for antibiotic prescriptions for viruses, which no antibiotic ever invented will fix. And by the idjits that stop their antibiotic course early, after killing only part of the problem, and leaving the rest of the bacteria sensitized and resistant.”
My point is that ppl OVERUSE antibacterial items to the point that this also has become an issue. Ppl have become SO germophobic that they don’t let their kids get dirty at all. Of course you should wash your hands and take prudent care of your clothing and home. If we didn’t, as you say, we would slide backwards. But in austere times, those who are the germophobes will fare worse than those who use antibacterial items judiciously, who also likely know that antibiotics don’t cure viral infections and use them judiciously and properly, eat ‘clean’, etc.
This can all be overwhelming and its hard to think of which prep or skill would be most essential.
However, all the preps in the world will be useless if you don’t have these two in your life:
1. A repentant heart and good relationship with Yahuweh
2. A servant’s heart and willingness to help others, bringing them the gospel of Yeshuah.
I can’t even imagine going through anything without Him and His power.
Thank you for sharing that resource. God bless!
I started keeping bees the beginning of this year. I’m looking to get my first batch of honey by the weekend.
This is a terrific, if not exhaustive list (as expected from you)! 🙂 I probably missed these things while reading, but if not, I would add anti-diarrheal medicine, like imodium, an Epi-pen for families with members who have severe allergies and are at risk of anaphylaxis, and ipicac syrup and activated charcoal to treat poisoning.
Pretty solid list! I was trying to push sanitation and medical prep every time I saw friends talking with family in hurricane affected states on social media. All that ammo is great, but cut your toe and dip it in flood water and you may as well give it all away.
Tess thanks again for the article, people can use this as a base line and add or delete as needed. If you don’t have your health in SHTF / or emergency your dead or at the very least a liability to others.
i am happy to see that the list has many things on it that USED to be forgotten…good job, tess!
Being prepared to stay or shelter in place is great, but being ready to evacuate or bug out and know when you have to change the plan is where it is at. I plan on sheltering in place in a disaster but know that I may have to change and go at a moments notice. I try to be prepared for either. I am getting there. I have a long way to go but am always learning and thinking through scenarios and what ifs.
Absolutely amazing. Very thorough article. My take, sanitation MUST be considered an every-day-all-the-time concern for everyone involved. I have plans for my home and family, for the groups and associations I’m involved with, but I wonder about what my neighbors would do in a significant situation.
I guess all we can do is all we can do.
In my mind the absolute one thing thing you need regardless type of disaster is the ability to have clean/healthy water. storing a usable amount of (a gallon pr person)water and having at least a quart of bleach available to go in a chrises would be my choice. but then again maybe I watch to much reality tv 🙂
I always learn something new and important to living a self-sufficent life. Keep the articles coming
I found the medical section particularly useful.Thanks for so much information all in one place. It is a very useful resource.
Another pantry first aid item is sugar, a light coat of sugar on a wound has antibiotic properties as well as honey.
There is a big difference between antibiotics and antibacterials. Honey is a good antibacterial and very poor as an antibiotic. The difference is antibacterials are things you apply topically to wounds and infections. Antibiotics are compounds one generally takes orally, thru injection or intravenously and it works systematically thru the circulatory (blood) system to attack the infection. Please beware promulgating the notion honey is an antibiotic prompting thinking that honey is a substitute for ampicillin, zithromycin, and others. It is not. Honey can be a substitute for bacitracin to put on a cut.
Be proactive and try to build up your immune system so that if you are exposed to any of the bad bugs it will be harder for them to take hold. Even a mild bug can turn into a major problem if your natural defenses aren’t strong.
Wow! That was very comprehensive, thanks for the info. The one tip I would add is store/use your medical supplies just like you would your food. Use the fifo rule, first in, first out. That way you are always rotating your stock.