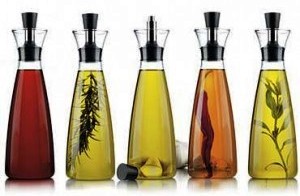
 We are all familiar with infused oils used in culinary practices, but have you put any thought into the medicinal uses that infused oils can provide us? Some of our first civilizations used infused oils extensively in their medical practice, food preparation, and in religious ceremonies. In WWII, medical grade infused oils were used on wounded soldiers on the battle field to prevent infections, and heal burns.
Infused oils provide therapeutic benefits to the body through absorption of the skin and through inhalation of the lungs. Using the right type of oil to carry the medicinal and therapeutic properties to the skin is key. Carrier oils are typically plant-based and do not contain a concentrated aroma or evaporate like essential oils, which are more volatile. Oils that are unrefined, cold pressed and/or organic oils are the best types of oils to purchase. This ensures that all the nutrients and benefits are still present in the oil. Below is a list of suggested plant-based oils that can be used for making infused oils.
- Almond oil – Good for all skin types, alleviates dry skin, soothes inflammation, relieves itching from skin conditions (eczema, psoriasis and dermatitis), relieves and soothes sunburns.
- Avocado oil – Contains essential vitamins A, D and E, moisturizes and soothes sensitive skin, assists in soothing scaly skin and scalps, has anti-bacterial properties, helps to stabilize oil-in-water emulsions.
- Coconut oil – Moisturizes dry skin and dry hair, soothes irritated skin and has a longer shelf life than most plant-based oils.
- Grape seed oil – Strengthens tissue cells, preserves natural moisture in skin, absorbs quickly.
- Olive oil – Moisturizes dry skin and relieves itching, helps the synthesis of substances like collagen and elastin
- Sunflower oil – Deeply conditions weathers, aged or damaged skin.
- Wheat germ oil – Treats dry and aging skin, assists in cell regeneration, aids muscle and lymph function, relieves dermatitis symptoms, prevents and reduces scarring.
Store the oils in a cool, dark place to prevent spoilage. If, over time they have a rancid smell, throw the oil away.
Infused oils are easier to make than you think. In fact, you do not need any formal training to make infused oil. Do some research beforehand to find the herbs best function for your overall health. Click here to view 30 of the most popular herbs to consider.
Equipment:
- Air tight container that has been cleaned and preferably sterilized.
- Fresh or dried herbs
- Plant-derived oil
Instructions:
- Gather the herbs or flowers you wish to infuse. Ensure the herbs are clean and dry to the touch. Dried herbs can also be used, however, many herbalists feel using dried material will render an inferior product.
- Chop or tear the herbs or flowers in order to release the oils more quickly (leaves, flowers or roots). When using fresh herbs, you will need enough to fill your jar. When using dried herbs, fill jar 1/3 full.
- Label the jar with both the contents and the date.
- Add plant-derived oil. Be sure to fill the jar completely with oil, covering the top of the herbs or flowers, then seal tightly. Ensure there are no air bubbles.
- Set your jar on a shelf, window sill or counter that is NOT in direct sunlight. Once a day, gently turn the jar upside down for a few seconds, then return it to a right side up position. Repeat this process for a minimum of 2-6 weeks to get the appropriate infusion. Note: Different herbs have different infusion times, so be patient.
- Strain your oil using a cheesecloth or by adding a paper coffee filter to the mesh type strainer. Be sure to transfer only to clean and moisture free containers. Infused oils that you are going to use in food preparation should be stored in the refrigerator.
