 As we progress on our preparedness paths, we want to ensure that the preps we store serve multiple purposes in order to deserve space on our preparedness pantries. After all, we don’t want to have a supply museum, but rather a working, efficient pantry.
That said, how many of you have stocked Crisco in your preparedness pantry? In all honesty, I rarely use vegetable shortening in my cooking, but through my preparedness endeavors I have found other uses for it. For instance, did you know that you can use Crisco to make a candle?
Another use for the mighty tub of Crisco is to make soap with it. Vegetable shortening is a cost effective way to add fats to your soap while keeping the cost down. My purpose for trying this method was to experiment with hot pressed soaps without using all of my expensive oils that I purchased.
Soaps made from vegetable shortening produce a mild, stable lather that can be used in conjunction with other oils. Those experimenting with making soap can either use half vegetable shortening in their recipes to keep the cost down or use only vegetable oil as their sole base oil.
Use the saponification chart to see how much lye (sodium hydroxide) will turn certain oils into soap.
I used a basic recipe for vegetable shortening soap, found here. Rather than heating the Crisco in a metal pan, I used a large crock pot.
Easy Crisco Soap
- 3 lbs. Crisco (1 can)
- 6 oz. lye
- 12 oz. water
- essential oils, optional
- Melt and heat the Crisco in a crockpot on a high setting to thoroughly melt.
- Place cold water in a glass bowl and slowly add lye while stirring with a wooden spoon. Stir until water is clear if you can.
- When the Crisco and lye are warm to the touch, pour lye into Crisco while stirring. Keep stirring until you get trace, about 25-30 minutes. Stir in any essential oils. Note: This recipe fits nicely in an 8×8 inch container, but other containers, such as pringles cans or specialty soap molds work just fine, too.
- Put molds in a warm, insulated place, let set 24 hours and then cut. Place on to rack and let cure for 2-3 weeks.
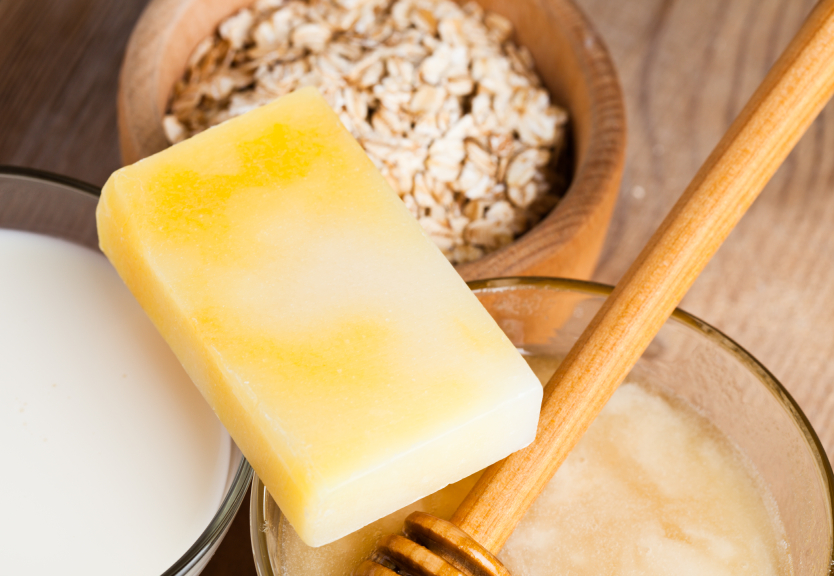
Honey Oat Soap
Adaptation from Karon Adams at Sugar Plum Sundries ©
- 12 oz. veg shortening
- 4 oz. coconut oil
- 1 oz. beeswax
- 1 cup distilled water
- 2 oz lye
- 1/8 cup (1 fluid ounce) honey
- 1/2 cup oats, optional
- Mix lye and water, allow to cool.
- Melt vegetable shortening.
- Over a double boiler, melt wax and coconut oil together together, and keep warm. When shortening is 120° and lye is 100°, pour lye mixture into shortening and stir until tracing occurs.
- Pour wax and oil mixture into soap mixture stirring constantly ( the mixture will get VERY thick with the addition of the beeswax mix) When the beeswax mixture is completely blended, stir in the honey and pour into molds. Sprinkle oats on top of mixture.
- Unmold after 24-48 hours. Allow to age for 3 weeks.
- Note: Honey soap is a beautiful soap with a wonderful sweet smell. It comes out a great deep brown color, and feels fabulous on your skin.
Tip: When you are measuring honey or molasses or any other viscous liquid along those lines, if you spray the measuring cup or spoon with a PAM type spray, the honey will pour out more completely, and cleanup will be much easier.
This article was originally published at Ready Nutrition™ on April 16th, 2013


I have been way too fearful to try making my own soap, but this actually doesn’t look so difficult. Thanks for the Crisco recipe!
Where do you get the lye? I haven’t seen Red Devil in the store for some time now (drug thing I think).
I purchased my lye at http://www.Amazon.com, but I know a lot of soap soaps online carry it too.
I so want to try making my own soap! And I didn’t know you wrote a cookbook, little lady! I’m going to have to purchase that baby! 🙂
Yvette – it was so much fun! This was the perfect recipe to try making soap with.
I have been stocking up on essential oils too and this gave me the perfect opportunity to use them. They smell amazing and I can’t wait to use them.
Thank you for the tips! I learn something from someone who takes the time to share great information and tips!
What does until you get trace mean?
Do you recommend these recipes for first time soap makers? im nervous about using lver but these recipes seem very simple and easy for a first time.
*lye* not lver
@ Vikki – Trace is when it thickens to the point where you can drop some of the mix back in to itself and it leaves a trail. At this point use any herbs, scent, or coloring and stir and pour mold(s).
I wrote a beginners tutorial on the subject that may be helpful when starting out. It has a lot of the terminology listed too.
Hope this helps!
Tess
@ Joni – I used this soap recipes for my first time because Crisco is cheaper than purchasing all of the base oils (avocado, olive, shea butter, etc.), but you can use a different recipe as long as you have all of the ingredients for it. The method can stay the same though.
Thanks,
Tess
Hi – I used to make soap years ago and what I have not seen in the article, replies etc so far is that coconut oil gives the best lather of any oil. Hydrogenated oils (solid consistency) are terrible for your arteries but make great soap! Hyd. coconut oil is used a lot for making popcorn in commercial machines. I’d buy huge (and cheap, per ounce) containers of it wholesale. Make sure it isn’t full of salt and popcorn flavoring.