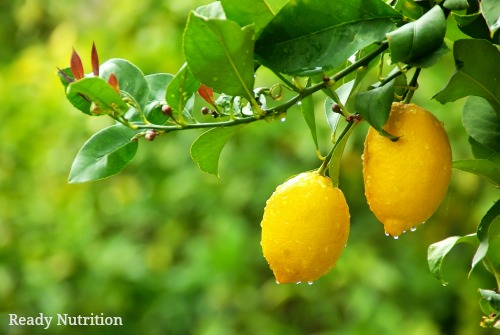
Lemon trees make wonderful potted plants to have on your patio garden and will be easy to access from the kitchen! With a little bit of effort, you could be using homegrown lemons in your drinks and recipes in just a few months.
Start a Lemon Tree in Seconds
Before you start, you’ll want to make sure that you are using a seed from an organic lemon as non-organic lemons typically have non-germinating seeds that will not grow. You’ll also need a seed pot, a larger planter pot, some plastic wrap, and fertile soil.
Step 1: Work With Damp Soil
Lemons need very moist soil so before planting, you’ll need to properly and thoroughly moisten the potting soil. Because lemon trees have a tendency to dry out, make sure you don’t skip this step (but also don’t overdo it—keep the soil damp but not watery).
Step 2: Add the Soil to Your Seedling Pot
Fill your smaller seedling pot with soil, leaving a small gap (1-2 inches) at the top
Step 3: Pick and Plant Your Seed
Take your organic lemon and squeeze out the juice and seeds into a bowl. Pick the seed that looks the largest and heartiest. Plant your seed a half an inch below the surface of the soil in your seedling pot. Water the soil immediately afterward.
Step 4: Put Plastic Over the Pot (or not!)
Like all citrus plants, lemon trees flourish in warm climates. You’ll want to cover your pot with plastic (regular cling wrap will work but you’ll need to poke several tiny holes in it so that it air can circulate). Be careful that you do not overheat or dry out the soil—if you believe that it is warm enough in the space where your seedling is planted, you might not need the plastic cover.
Step 5: Transfer the Seedling to a Larger Pot
Once the seedling sprouts, you can transfer the seedling into the larger pot that will become your lemon tree’s permanent home. If you’ve been using the plastic cover on your seeding, you can continue to do so once the transfer is made. Once your tree starts to really gain height, you can place the planter outside for a few hours each day so that the tree gets proper sunlight. You’ll know your conditions are ideal when your fruit starts to grow! Also, remember to give your new lemon tree some citrus fertilizer to give it the best growing conditions.
If you want to bypass the seed process, there lemon trees are usually readily available at commercial garden stores and you can even order them online, but you won’t have as much control over what growing medium will be used. Do some research to find out which lemon tree variety grows best in your neck of the woods.