This article is written by Mr. McGregor
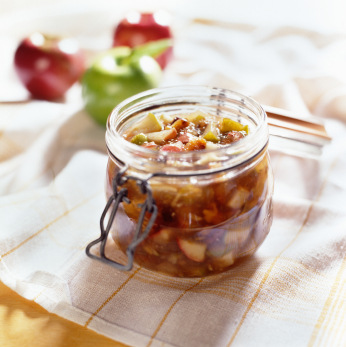 The autumn tends to be a busy month for those who have created an established survival garden. It is a time where many of us head out with our spades and harvest the crops we have tenderly cared for throughout the growing season, and we can often be left with more than we bargained for. If you’ve had a bumper crop to harvest this season it can be challenging to think what to do with it all.
There are many ways you can prolong the life of your freshly grown produce. From pickling and freezing to creating scrumptious jams there are many methods you can use to feed your family for months to come.
In this article, I will share with you some top tips for storing produce and to preserve and pickle vegetables and fruits, along with a guide on making flavored vinegar.
Top tips including health advice
- When preserving fruit avoid anything with bruising or imperfections
- Storage should always be ventilated
- Check fruit regularly, removing any blemished fruit swiftly
- When storing soft fruits, the freezer is the best option
- Keep individual fruit wrapped up to keep it at its freshest – one rotten apple can ruin an entire harvest
- Jams should be consumed within six months after it has been stored for a couple of weeks
- When freezing fruit and veg store small quantities in freezer bags to prevent defrosting more than your family can eat
Preserving fruits and vegetables
Chutneys
Chutneys are simple to make, it’s just waiting a month or so until you get to taste it that’s the most frustrating part. Often made using apples, chutneys are a great way to preserve and store left overproduce, but the most exciting part is that you can create so many different flavors. You can substitute the apples for pumpkins, other fruits, and even green tomatoes.
- If you are using apples firstly peel, core and chop 2lbs of them into bite-size chunks and put them into a large saucepan.
- Then peel and chop some ginger (about 2cm) finely and place into the same saucepan, add roughly chopped onions (1lb or so), and finely chopped garlic (two cloves). I always find it best to chop garlic rather than using a crusher; it ensures you reap all the benefits garlic has to offer. Then finally add a pinch of chili flakes.
- The next step is to stir in 500ml of distilled malt vinegar, one and a half teaspoons of salt and 250g (about half a pound) of muscovado sugar over medium heat. Keep stirring until the sugar has dissolved and then bring it up to a boil.
- Once it has begun to boil, you need to start reducing the mixture. Turn the heat down and leave for about an hour, returning to the pan every now and again. What you’re looking for is the mixture to thicken; once this happens to stir more regularly to prevent the sugar from sticking to the bottom of the pan. The thicker it gets the better, and the way to know when your chutney is done is when the mixture doesn’t flow back once you’ve created a gap.
Storing chutneys
- Ensure your jars are clean and dry
- Spoon the mixture into each jar and seal while it is still hot
- Store in a cool and dry place for about three months
Why not try a courgette and tomato chutney?
Freezing
One of the simplest and quickest ways to preserve and store a glut of fruit and veg is to freeze it. Almost everything can be frozen including herbs, berries, and beans. The only problem you may come up against is the amount of room you have left in the freezer. Read my top tips above for more freezer storing advice.
Jams and Jellies
Almost any fruit and vegetable can be made into a delicious jam or jelly. It can be a lengthy process, but it still remains one of the easiest preserving methods.
- To begin with place a few saucers in the freezer; it will all come clear at the end
- With your fruit you simply want to wash and crush it, then place into a large saucepan
- Add about 1lb of sugar to your crushed fruit and leave it over low heat, stirring every now and again until the sugar has dissolved
- Once the sugar has dissolved bring it to the boil – your bubbles need to be going at a rapid pace that won’t be calmed by any stirring. This needs to take place for about five minutes until it is at a set point. What you need to look for is a thicker mixture that boils at a slower pace, producing heavier bubbles
- Now comes the time to test, which means bringing those saucers you placed in the freezer out. Remove the saucepan from the heat and ladle a spoonful of the mixture into the saucers. Leave for a few minutes then press your finger into the jam. You can tell when the jam is ready if it wrinkles. If it doesn’t, place the saucepan back on the heat for a minute or so and test again. Repeat this as many times as necessary.
Storing jams
- Once it is set ladle the jam into the jars and seal while it is still hot, it will thicken as it cools.
Herb jellies are also an effective way to use up those unwanted fruits. Use an apple jelly as a base and then add any herbs you have lying about.
Another jam recipe you may want to test out could be caramelized onion and roasted garlic jam.
Pickling vegetables and fruits
You can pickle most fruits and vegetables, but I love the taste of pickled peppers. All you’ll need is four tablespoons of pickling salt, two tablespoons of brown sugar, two cloves of garlic, 8lbs of peppers and five cups of distilled (5%) white vinegar.
- Pour your sugar, salt, and garlic into a clean jar and pack in the peppers making sure the skins are facing out
- Pour in the vinegar and add half an inch of boiling water
- Seal the jar and place into a saucepan of boiling water for about five minutes once the water has begun to boil
Storing pickled fruit and vegetables
- Leave to stand for 12 hours and then place the jar proudly in your cupboards
Another recipe you may want to try could be pickled onions.
How to make flavored vinegar
I’ll leave you with the simplest of all methods, flavored vinegar. With this, all you need is a white wine vinegar or cider vinegar and some fruit. Put them both into a mixing bowl and leave for about five days to ensure the vinegar is infused with the color and flavor of your fruits. Once it has been left to stand, strain the vinegar back into the bottle, and hey presto!
About the author:
Mr. McGregor is a gardening enthusiast who loves nothing more than getting his hands dirty and feeding his family food grown from his garden. Along with a busy harvesting schedule, Mr. McGregor also writes for the popular garden center, Notcutts sharing his knowledge and experiences in the horticultural community.
This article was originally published at Ready Nutrition™ on October 17th, 2013






Don’t forget leftover fruits and bruised fruits can be used for moonshine!