Have you ever been searching through Pinterest and found a project you know you wanted to do? Of course, you have! Last Fall I was looking for ways to expand my garden, and I came across an article on pallet gardens. I just knew that I could add one or two to my garden area and grow winter vegetables in it.
A pallet garden is an easy and frugal way to grow compact vegetables and herbs like salad greens, baby kale, dwarf peas, bush beans, cabbage, and herbs such as parsley, thyme, basil, and rosemary. Another consideration is growing edible flowers like pansies and calendula. Concentrate your efforts on finding vegetable crops and varieties that have shallow rooting systems and grow in compact, bush, dwarf, or miniature form.
But before you get your pallet garden started, here are a few important facts I discovered.
Related: A Quick Guide to Small-Scale Homesteading
Pallet Gardening in 5 Easy Steps
- Locate a pallet – Pallets are quite easy to obtain. I was at our local hardware store buying some vegetables, and I noticed when we drove up, they had a stack of pallets off to the side of the building. When I was checking out, I asked the owner if I could purchase one. She offered to give me as many as I wanted. Score! Later that week, I learned that a lot of businesses that have items shipped to them have available pallets; however, it is important to find out if the pallets have been treated with chemicals because that will contaminate your organic vegetable garden.
- Clean the pallet – Because it is impossible to know the history of your newly acquired pallet, it is a good idea to wash it – even if the person you obtained it from said it was clean. Pallets are normally used in warehouses or retail operation locations and many people may have come in contact with your pallet or laid it near chemicals that you do not want in your organic lettuce. Pallets are easy to clean. First, inspect the pallet for open splinters or for nails protruding through the wood. You do not want to have to visit the Emergency Room for a tetanus shot because you lost a battle with a rusty nail. Once the pallet is safe, wash down the pallet with soap and water. I washed mine multiple times and rinsed it off between each cleaning.
- Cover your pallet – When I got my pallet, I was so excited that I didn’t think to buy landscaping fabric, but my husband had plenty of spare tarps lying around thanks to his addiction to Harbor Freight; however, when you build your pallet, buy the landscaping fabric. Cover the bottom, back, and sides of your pallet, and then staple it about every few inches. Lastly, move the covered pallet to where you want it located in your garden.
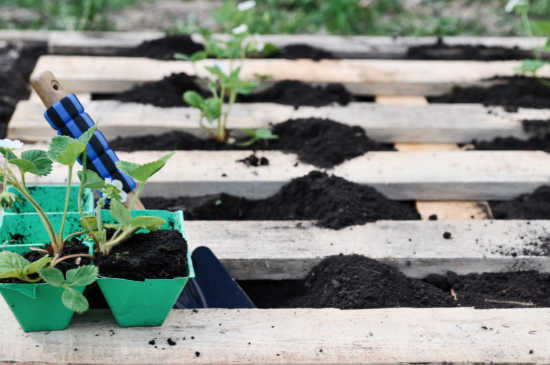
- Add your soil – I used three bags of an organic compost/potting soil mixture and half a bag of vermiculite that I bought from my local hardware store. Once the dirt was in, I grabbed a broom and swept any loose soil that had accumulated on the pallet boards into the dirt mixture.
- Plant your garden – Once the dirt is in place, grab the plants you want to place in between the slats of the pallet. In my case, I planted open-pollinated seeds like cabbage and lettuce seeds, but herbs do well grown in pallets too. I followed the directions on the seed packet, watered the plants, and let nature do its work. I am pleased with how well our Fall pallet project turned out.
What do you plant in your pallet garden?
Related Articles:
7 Vegetables You Can Grow In 60 Days or Less
How To Grow Vegetables Year-Round in Container Gardens
10 Best Vegetables for Urban Gardeners
This article was originally published at Ready Nutrition™ on May 10th, 2021
