Combine Cache Points for the SHTF Retreat
The most important point that the reader must understand is DO NOT CACHE ALL OF THIS IN ONE PLACE! Everybody wants that “central location,” because everything is “there,” and it takes less time than making three or four different points. No, belay that thought, helmsman! Staggering it makes it more likely that some creeps will not get the whole treasure-trove. Same with all of the cached stuff such as food, medicine, etc. Bust it up into “thirds” and put it in three different places that you can find, but are not equidistant from one another. If you place all three in an equilateral triangle configuration, the way man’s mind thinks when he’s searching is to look along those “organized” lines.
Protect Your Caches from the Hordes with These 8 Considerations
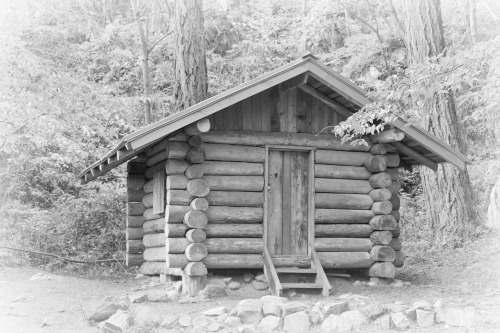
Whatever your BO location is (a cabin, shack, or semi-permanent structure) there are some factors that need to be considered, especially for these winter months. Be it a cabin, tepee, or permanent lean-to on someone’s land with permission…whatever the scenario, here’s what you need:
- The Perfect Spot: Because caches are the ultimate backup plan, you want to find an ideal location before you begin hiding your gear. Keep OPSEC in mind when you are finding your cache sight.
- Wood: A good supply of wood, that is not in the structure…off the ground (palletized), covered, and camouflaged. There are reasons for all of this, and we’re going to go with a cabin, just to simplify things. Have a wood supply in there already? You can bank on the fact that anyone who may get there before you will burn it…and fight to keep it.
- Hide the essentials: “Disable” the woodstove or remove it. Remove a section of the chimney pipe and close the hole in the ceiling. Wrap the pipe up in plastic and stash it where it can be accessed without being covered with ice and frozen over. Then (if you can) remove that woodstove and/or camouflage it. Make it inaccessible and disguise it. Those that find the cabin and think there’s no woodstove will probably leave.
- Food: Floorboard cache is the best way here, as it can’t be frozen over by the ground. It’s hard to “thaw out” an underground cache during the wintertime that has no fixed hatch to enter. Consider these must-have survival foods.
- Keep it bare: Keep that cabin “stripped” in terms of any creature-comforts…only a modicum of cooking utensils and supplies. You want it to “appear” as threadbare and uninviting as possible.
- “Secret Squirrel” cache: This is going to take some planning, some effort, and some funds. Remember the “bunker” the father and son found in the movie “The Road” in that backyard? You want something maybe not quite as large, but an excavated area with walls, a floor, and a roof/top/door to be able to enter during the wintertime after you dig away the snow and a few inches of dirt. Load it up with anything that can take a freeze…perhaps some MRE’s, dried foods, sturdier canned goods, ammo, medical supplies and medicines, and a weapon or two….and make sure it’s away from the cabin.
- Lean-To’s: all the items can be cached, including a “rocket” stove or a portable wood-burner. The lean-to (more akin to a shack) you can preposition pressure treated plywood and 4” x 4” s as well as 2” x 4” s with pre-marked and pre-drilled holes that you put it all together with lag screws and bolts. Make sure you keep a wrench and socket set on the site! Stick with pressure-treated only, as it will take the elements and the changes in temperature and moisture better. Make sure you have all the pieces clearly marked, a “blueprint” on a laminated sheet of paper, and that you have put it together. Practice makes perfect and can save you a lot of time and cut the stress down. These supplies you want to palletize and keep covered up and protected from moisture, bugs, thieves, etc.
- Tools: This may seem small, but it’s not. You want to preposition a chainsaw with extra chains, fuel, and oil, and a chain sharpener (yeah, after the SHTF, you’ll have time to sharpen those chains!). Pack up a good ax, a bowsaw and extra blades, a hammer, extra nails, a good hatchet, and digging tools (shovel, pickaxe, digging bar). It’s an extra expense, yes, but you won’t have to tote a set of all of these up there with you if you have to run. Have a set with you? So what? They’ll be worth their weight in gold when it all comes apart, and you’ll always have a use for a backup, as nothing lasts forever. As well, consider adding these items to your caches.
The only limits here are those set by your own imagination and desire to succeed.
Make no mistake: those who prepare this kind of thing beforehand are going to have it a lot easier than those who wait until the last minute or try to do it “post-collapse.” Having a place you can run to…and not just one, but several…follows the Army’s “PACE” concept…. Primary, Alternate, Contingency, and Emergency. Multiple layers of backup in everything you do…a “forced” redundancy…will carry you over and prevent losses, mistakes, and leave you with something if it all goes down. Don’t be left holding the bag…have a bag of “something” you stock up with before it all goes down the drain. JJ out!
Additional Reading:
What’s Missing From Your Survival Cache Could Be Your Greatest Mistake
I live in a rural area that is about as safe as any but I have taken all those precautions and more. But they are on my property and not some remote place.