“Good bread is the most fundamentally satisfying of all foods; and good bread with fresh butter, the greatest of feasts.”
― James Beard
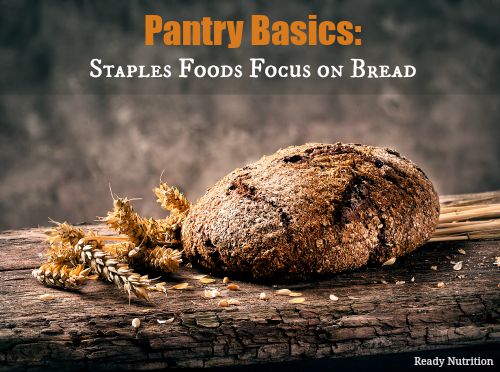
Staple foods are foods that are eaten consistently and in large quantities to make up the bulk of calories and nutrients in a standard diet. Bread, in all its forms is the most widely consumed staple in the world. In the United States, that food is usually bland, pre-sliced, store-bought white bread made with grains (usually wheat) that has been so stripped of its natural nutritional power that it now needs to be fortified. Learning to bake healthy, delicious bread at home is easier than most people think and certainly more economical.
There are two types of bread: leavened and unleavened. Unleavened breads are typically made with flour, water, and salt and then rolled into flattened dough, are dense in nature, and travel very well. Leavened breads are made by adding a “leavening agent” (also known as a raising agent) to dough which causes gas bubbles to form in the dough. This gives the finished product a lighter, fluffier texture.
“In a heartbeat, a thousand voices took up the chant. King Joffrey and King Robb and King Stannis were forgotten, and King Bread ruled alone. “Bread.” they clamored. “Bread, Bread!”
― George R.R. Martin, A Clash of Kings
Whether you’re living paycheck to paycheck or trying to stretch the foods you put up for winter, homemade bread can play an important role in filling bellies and nourishing the soul. But why go to all the trouble of making bread at home when cheap store-bought bread is so readily available right at your local store?
Economically speaking, the ingredients needed to bake homemade breads are still less expensive than buying the least expensive store-bought bread. In some areas of the United States where the cost of living is high, making your own bread costs about half as much as buying it from the store. Cheap store-bought breads are also filled with high fructose corn syrup, preservatives, and other ingredients that are unpronounceable. Having the ingredients on hand also allows you to make a variety of different breads whereas buying a cheap loaf of bread at the store gives you, well, a cheap loaf of bread.
And as the line goes made famous by George R. R. Martin’s Game of Thrones books, winter is coming. Winter can be an especially difficult time for people as they struggle with higher heating costs, bigger grocery bills due to higher caloric needs to stay warm in the winter, the need to buy or make holiday gifts, and small children with cabin fever.
We rely on wood heat in our home in the winter, but use a conventional oven. By baking our own bread, we’re not only saving on the cost of the bread itself, but we’re also adding to the warmth of our home and reducing the need to burn more wood to heat the house. Bread helps us stretch our food dollars by adding an economical source of carbohydrates for all the extra energy we burn up keeping warm while doing outside chores. A pot of a simple soup becomes a feast when homemade bread, fresh and warm from the oven, is added to the meal. And the aroma! There’s nothing quite like the earthy aroma of bread baking to wet one’s appetite. Suddenly we understand why bread is so often associated with sustenance and life itself.
Bread, and other baked goods, also makes great holiday gifts. Artisan loaves need not cost you a fortune. Many of the expensive “artisan” loaves one finds in specialty shops started out as peasant breads- inexpensive recipes made from easily accessible ingredients made by people who didn’t have enough time or money and had to make as filling and palatable of a meal with whatever was available.
Baking bread is also a great activity to do with small children. Not only will it keep them busy, but you’re also teaching your children several valuable skills: self-sufficiency, math, science, work ethic, and sharing. A child that learns to cook learns to feed themselves. Measuring ingredients becomes a lesson in math. Leavened bread becomes a lesson in science. While you wait for your bread to emerge from the oven, sit down for a little story time with the book The Little Red Hen to learn a lesson about work ethic. Once your loaf is done and cool enough to handle, break your loaf apart, slather with butter, and share the benefits of a family working together.
“I am going to learn to make bread to-morrow. So you may imagine me with my sleeves rolled up, mixing flour, milk, saleratus, etc., with a deal of grace. I advise you if you don’t know how to make the staff of life to learn with dispatch.”
Emily Dickinson, American poet (1830-1886)
Baking bread need not be a monumental, complicated task. I’ve included some recipes, from simple to more complicated to get you started. Now, let’s get baking!
Corn Tortillas
Ingredients
- 12 ounces nixtamalized corn flour, like Maseca
Preparation
- Cut 2 10-inch squares of thick plastic from a gallon-size Ziploc freezer bag and set aside to line an 8-inch tortilla press.
- Place the corn flour in a large bowl. Slowly add 2 1/4 cups hot tap water, kneading it in with your fingers. Once all the water has been added, knead until dough is smooth, 3 to 5 minutes. The masa should be very soft but not sticky, about the consistency of Play-Doh. If it is too dry, work in more water, 2 tablespoons at a time. If it is too wet, continue kneading until it dries out a bit or knead in additional corn flour. Masa dries out very quickly, so once it is at the right consistency, keep it covered with a damp kitchen towel.
- Heat a pancake griddle or a heavy nonstick or cast-iron skillet over medium heat. The goal is a steady medium-low heat.
- Pinch off about 2 ounces masa and roll into a ball about 1 3/4 inches in diameter. Flatten lightly between your palms to make a 2 1/2-inch round. Place one sheet of plastic on the bottom of the open tortilla press and place the dough in the center. Cover with the other sheet of plastic and press the lever gently but firmly to flatten the dough. Don’t crank the lever down as hard as you can because the tortilla will be too thin.
- Flip the tortilla (still in the plastic) and press lightly again into an even 6- to 6 1/2-inch round. Place the tortilla (still in the plastic) in your left palm. Use your other hand to peel off the plastic, then invert the tortilla onto your right palm and peel off the other plastic. Gently release the tortilla onto the cooking surface.
- Watching carefully, cook just until one of the edges begins to appear dry, 15 to 25 seconds. (If you overcook the tortilla at this step, it will not cook properly.) Flip the tortilla and cook on the second side just until it is speckled with brown spots, 1 to 2 minutes, rotating it once. Flip the tortilla back to the first side. The tortilla might begin to puff at this stage. When it is just beginning to brown on the bottom, flip again, back to the second side, and move to a cooler part of the cooking surface, toward an edge. Let the tortilla finish cooking there until most of it appears translucent when held up to the light, 30 to 60 seconds.
- Stack cooked tortillas in a basket lined with a large napkin that you can fold over the top, which will let them continue steaming, keeping them soft and pliable. If not using immediately, store cooked tortillas in the refrigerator, well wrapped. To reheat, place directly on a hot surface or wrap in a damp towel and heat in the microwave for a few seconds.
Acorn Griddle Cakes
Source
To make cakes, you will need the following:
2/3 C finely ground leached acorn meal
1/3 C unbleached flour
1 tsp. baking powder
1/3 tsp. salt
1 Tbl honey
1 egg, beaten
3/4 C milk
3 Tbl melted butter
Combine dry ingredients. Mix together egg and milk, then beat into dry ingredients, forming a smooth batter. Add butter. Drop batter onto hot, greased griddle. Bake, turning each cake when it is browned on underside and puffed and slightly set on top. Makes 12 to 15.
King Arthur’s Classic White Sandwich Bread
Source
Ingredients
- 1 cup + 2 tablespoons to 1 1/2 cups lukewarm water*
- 1 heaping tablespoon honey
- 2 1/4 teaspoons instant yeast
- 1 3/4 teaspoons salt
- 2 tablespoons soft butter
- 4 cups King Arthur Unbleached All-Purpose Flour
- 1/3 cup Baker’s Special Dry Milk or 1/2 cup nonfat dry milk granules
*Use the lesser amount in summer or humid climates; the greater amount in winter or drier climates.
Preparation:
- Mix all of the ingredients in the order listed, and mix and knead — by hand, or using a stand mixer — to make a smooth dough. It won’t be particularly soft nor stiff; it should be smooth and feel bouncy and elastic under your hands.
- Place the dough in a lightly greased bowl or other container. Cover it, and let it rise at room temperature until it’s very puffy, 1 to 2 hours.
- 3) Gently deflate the dough, and shape it into a fat 9″ log. Place it in a lightly greased 9″ x 5″ loaf pan.
- 4) Cover the pan, and let the dough rise for 60 to 90 minutes, till it’s crowned 1″ to 1 1/2″ over the rim of the pan. Towards the end of the rising time, preheat the oven to 350°F.
- 5) Bake the bread for 20 minutes. Tent it lightly with aluminum foil, and bake for an additional 15 to 20 minutes, till it’s golden brown. An instant-read thermometer inserted into the center will read 195°F to 200°F.
- 6) Remove the bread from the oven, and turn it out onto a rack to cool. When completely cool, wrap in plastic, and store at room temperature.
Yield: 1 large loaf, about 18 servings.
Berkeley Sourdough Bread
Source
For the starter:
• 1 piece of starter* the size of a tangerine (kept out at room temperature for 6 to 8 hours or in the refrigerator for a few days)
• 2 cups warm water
• 2 cups organic, unbleached white or all-purpose flour
For the dough:
• 2 1/2 cups organic, unbleached white or all-purpose flour
• 1 1/2 teaspoons salt
• 3/4 cup starter from the previous step
• 3/4 cup cool water
• Cooking oil (to grease the bowl)
Preparation
- Break up the starter, dilute it in the water, and mix in the flour. Cover this mixture loosely and set it aside in a warm spot for 18–24 hours or until it is quite bubbly.
- Mix the flour and salt together in a food processor fitted with the plastic dough blade. Pour the starter in and pulse the machine several times to mix the ingredients. Then, with the machine running, slowly add the water and continue mixing for a few minutes (If you don’t have a food processor, simply mix the dough in a bowl for about 5 minutes, until it forms a ball.)
- . Remove the mixture from the bowl and place it on a well-floured work table and round it into a ball.
- Let the dough rise in a well-oiled bowl, covered, in the refrigerator for 12–15 hours. Remove from the refrigerator and allow it to warm up at room temperature for 2 hours
- Divide the dough into 2 pieces, and stretch them into tight baguette shapes. Place each one on a baguette tray or a parchment-lined baking tray.
- Cover the baguettes and let them rise for 6–7 hours, until they have doubled in size.
- Preheat the oven to 450° F.
- Using a sharp razor blade, slash the tops of the loaves diagonally 3 or 4 times (this will allow them to expand more easily while baking) and spray them with a fine mist of water from a spray bottle.
- Place the loaves in the oven and immediately spray them, along with the walls and floor of the oven, with water. Repeat this step after about 5 minutes of baking.
- Bake the loaves 25–30 minutes, until they are entirely golden and the crust is crisp and blistered.
*Starter
Ingredients
- 1 small handful (1/4 to 1/3 cup) white flour
• 1 or 2 tablespoons of water
Preparation
- In a mound of flour, make a small well and add the water.
- Slowly mix the flour and the water, bringing more flour into the center of the well. The mixture will gradually transform from a paste into a small piece of dough.
- Knead this small piece of dough with your fingers for about 5–8 minutes, until it becomes springy.
- Place the dough in a small bowl, cover it with a damp towel, and let it sit in a warm spot for 2 or 3 days.
- When it’s ready, the dough will be moist, wrinkled, and crusty. If you pull off a piece of the crust, you’ll find tiny bubbles and smell a sweet aroma.
- . Throw away any hardened crust. “Refresh” the remaining piece by mixing it with twice the original amount of flour and enough water to make a firm dough. Set aside as before.
- After 1 or 2 days the starter will have a new, fresh look. Remove any dried dough and mix with about 1 cup of flour.
- Once again, cover the bowl with a damp cloth and leave it in a warm place for another 8–12 hours.
- When the starter is ready, it will appear fully risen, and a small indentation made with a finger won’t spring back.
Now the starter is ready to be used in virtually any sourdough recipe. Remember to save a small piece of the starter: You can put it in the refrigerator for several days, then refresh it again as above and use it to make another loaf. A good starter will serve you for years to come!
This article was originally published at Ready Nutrition™ on September 14th, 2015


