No food storage pantry is complete without some dehydrated food. Dehydrated foods have been used for centuries to preserve the bounties of the garden for use during winter and times when food is scarce. What makes this food storage method so attractive is that it is cost-effective and uses food that you already have.
In a previous article, it was noted that many believe this preservation method is the safest, most affordable, and best way to preserve flavors of foods. The dehydration process removes moisture from the food so that bacteria, yeast, and mold cannot grow. The added benefit is the dehydration process minimally affects the nutritional content of the food.
In fact, when using an in-home dehydration unit, 3-5% of the nutritional content is lost compared to the canning method which losses 60-80% nutritional content. Additionally, important vitamins and nutrients such as vitamins A and C, carbohydrates, fiber, potassium, magnesium, selenium, and sodium are not altered or lost in the drying process. Therefore, the end result is nutrient-packed food that can be stored long-term.
It’s easy to bulk up your emergency food pantry by dehydrating food that you have around you. With a meager $50 investment into a food dehydrator, you can:
- dry vegetables for soup mixes
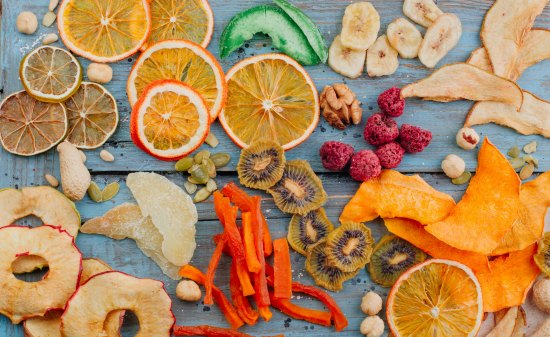
- dry fruits for snacking
- make jerky
- fruit or vegetable leather
- noodles
- and even make crafts
One way that I put my dehydrator to use is to dry up fruit and vegetables that are not being eaten. When I buy fresh fruit and vegetables, I give it a week to be eaten, and if it hasn’t, then it’s dehydrated and placed in my food pantry. Ironically, my kids love grabbing dried fruit snacks for sports games and for when they are on the go.
Before you go crazy dehydrating, keep in mind that there are a few rules to follow to ensure food longevity, freshness, and prevention of discoloration.
There are Different Ways to Dehydrate Your Foods

While I prefer using a food dehydrator, there are multiple ways that you can dehydrate food. One of the simplest is natural air drying. This is best used for fruit, vegetables, and herbs as meats and dairy can spoil and create food-borne illnesses. To air dry, simply place the fruit or vegetable on a plate or hang it from a well-ventilated space and allow air to naturally pull the moisture out. This is how many prefer to dry herbs.
Another option for dehydrating is to use your oven. Similar to using a food dehydrator you want to ensure that you cut your fruit and vegetables in ¼ inch slices. Turn your oven to its lowest setting and place lined trays of fruits and vegetables in the oven for as long as they need, usually 6 to 8 hours. Rotate the trays every few hours to ensure they are evenly dehydrating.
Another fun option is to get a Sun Oven and start practicing with it. All you need is some sun and something to cook. The Sun Oven company even has multilevel dehydrating accessories to help make use of space. Here are 7 other ways to use a Sun Oven.
10 of the Easiest Food Types You Can Dehydrate

- Noodles – During times when the power is out, you want to have foods that are filling, serve multiple uses, are easy to make, and do not require a lot of fuel consumption. Dehydrating noodles serves all of those purposes. I love making homemade noodles, but you can easily cook up some store-bought noodles and dehydrate them too. When you are ready to enjoy them, simply add them to some boiling water and they’re ready in minutes!
- Meat – Bring on the protein! We all know how important protein is to our nutrition, so it makes sense to have some on hand when you need it most. While jerky and pemmican are both very common for food pantries, you can also simply dice up some meat, cook it and set it in the dehydrator. This will be great for just-add-water meals. Here are some great recipes to start with. For dehydrating poultry, follow the instructions on your dehydrator and make sure that the chicken reaches an internal temperature of 140 degrees Fahrenheit. As a note of caution, it’s best not to dehydrate anything else other than the poultry in order to avoid food-borne diseases.
- Potatoes – We all want some “stick-to-your-ribs” foods and because of the versatility of the potato, it makes for a great addition to the prepper pantry. When dehydrating, it’s best to cook the potatoes first and then dehydrate. I like to make potato flakes to store to make instant mashed potatoes, thicken soups or make homemade potato soup.
- Veggies – When you have to get rid of a plethora of vegetables, dehydrating is the way to go! You can prep dry soup mixes which are great for hiking trips or even bug out bag meals. One of my favorite snacks I like to make is dehydrated veggie chips. Simply cut carrots, parsnips, and beets into 1/4 inch thick slices. I also add some green beans too. When you have sliced your vegetables, add some sea salt, and place on a dehydrator. Another way I like to enjoy dehydrated vegetables is by making an all-purpose vegetable seasoning. It goes great in everything! I also like to dice onions and garlic very fine and dehydrate them to add to my spice rack. I’m saving so much money doing this too!
- Fruits – From a frugal shopping standpoint, you can purchase fruit in bulk and rather waiting for it to be consumed. Why note dehydrate half of it to use for adding to breakfast cereals, fruit bars, or to snack on?
- Beans – More protein! High in fiber, protein, minerals, and vitamins, beans and lentils are a nutritious pantry stable. In fact, beans and rice are a complete protein source! Smaller beans have shorter cook times and will conserve limited fuel sources in an emergency (keep cook times in mind when stocking food for emergencies). Cook smaller beans like navy beans, lentils, or split peas with no oils or meat and dehydrate them. This will cut down on fuel consumption and water.
- Spices – Herbs are great from so many standpoints. Whether you are trying to bulk up your spice shelf, make homemade teas, or try your hand at making medicinal herbs, dehydrating herbs are the way to go. Dehydrating herbs that have high moisture contents such as basil, oregano, tarragon, lemon balm, and mints can help reduce molding during the drying process. The best time to harvest most herbs for drying is just before the flowers first open when they are in the bursting bud stage. Pick large leaves off of their stems before placing them on a dehydrator rack. Small leaves, like thyme can remain on the stems and picked off after the drying process. According to Herbal Academy, “Drying times will vary depending on the moisture content of your herbs. Loose, fine herbs like yarrow and mint will dry more quickly than moisture-filled herbs like plantain or comfrey. Expect 1-4 hours for most herbs.”
- Eggs – If you have an overabundance of eggs, why not dehydrate them. Dehydrated eggs can be powdered and stored much longer than fresh eggs. The easiest method is to scramble eggs on a skillet and then add them to the dehydrator tray and follow your dehydrator’s directions. Usually, they should be left at 150 degrees F for about 4 hours or so. Once they are fully dehydrated, you can either leave them in “scrambled form” or put them in a blender to turn into powder. Use them in almost any of your favorite cooking and baking recipes.
- Yogurt – What?! I bet you didn’t know you could dehydrate yogurt – but you can! Dehydrated yogurt sprinkles are great in granola blends, in cereals (for extra protein), and even added to smoothies. To dehydrate yogurt, spread your favorite yogurt out onto your fruit leather or jelly roll tray in an even layer. Place the tray into your dehydrator, turn it on low and allow the yogurt to dry completely. This usually takes about 8 hours. Once it is dehydrated, break the dried yogurt into pieces and process in a blender to turn into a powder. Store the yogurt powder in an airtight container. When you are ready to rehydrate the yogurt, simply stir in water a little bit at a time until it reaches the consistency you want.
- Cheese – Since we talked about yogurt, we can’t leave out the cheese. You can read more about the process here.
Creating a well-stocked food pantry to turn to for emergencies takes a lot of stress off our shoulders and helps you save money in the process! For centuries, dehydrating food has been used as a means of survival. Many consider this to be the most affordable preservation method and the best way to preserve the flavors of foods.
This article was originally published at Ready Nutrition™ on May 17th, 2020


I make my cats food and have made several batches and dehydrated it. Since our meat sources are drying up or will soon be so expensive a lot of us won’t be able to afford it. No meat means no dog and cat food. I also have loaded up on dry food and vacuum sealed it into small batches.
I also just dehydrated about 15lbs of potatoes. Recipe I followed did not say to cook first but said to soak them in lemon juice or they will turn black.
GREAT IDEA! questions: can you tell me the recipe you use for your kitties? I have a 15 yr old, doesnt eat much, picky, and hate wasting food he wont eat. also, can you dehydrate wet food from a can or package? if so how? dont know how long it would stay in the can or package – so I can stock up.
as for dry food, guess it would be fresher to vacuum pack in smaller batches than use outa bag right?